Basic tutorial 1: From the blank sheet to the block layout
This tutorial is intended for new users. It teaches basic steps for block layout construction. Have you already got an overview?
Introduction
To get from a proverbial blank sheet to a block layout we will position physical planning models and abstract block layout objects in the layout area of the visTABLE®touch application. You will get to know the model library and you will learn how to work with the models in the layout area.
Step 1: Create a new layout
Please follow the instructions in the video to create a new layout document. Set the following layout properties:
Project name: Quick StartDimension horizontal [m]: 40Dimension vertically [m]: 40
After setting the properties please save the layout document as shown in the video.
Step 2: Find and place suitable resources in the model library
The extensive model library of visTABLE® is continuously growing. That is why it is important to know how and where to find operating resources and other 3D models. The following video shows the possibilities:
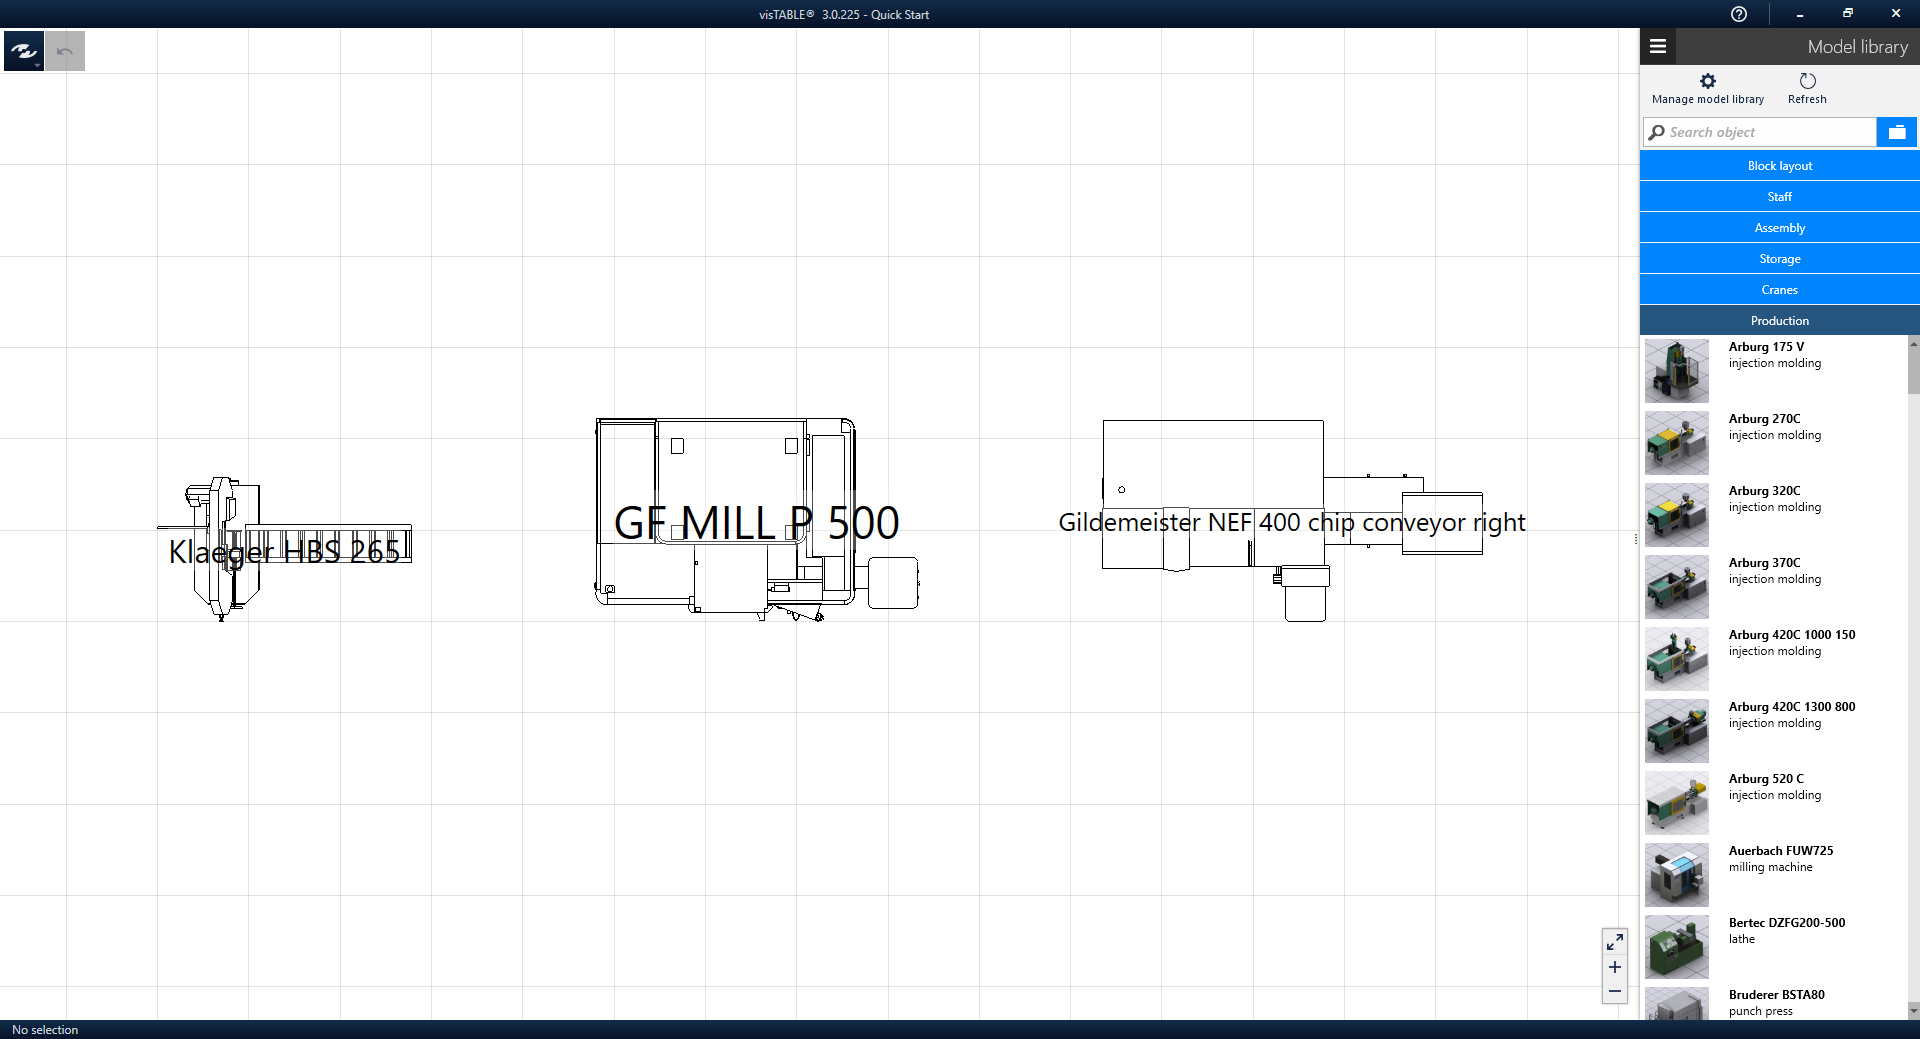
To build a simple layout, find the following models and drag them into the layout area:
- Klaeger HBS 265 (sawing)
- Gildemeister NEF 400 (turning)
- GF MILL P 500 (grinding)
To arrange the operating equipment in the layout use finger gestures, mouse and/or key combinations. See how it works effectively in the next video:
To begin, simply form a row of the machines, as shown in the picture.
Step 3: Set the object properties
After placing an object it is necessary to check the object properties. The selection options for objects are shown in the next video:
The most important object properties are
- object name, defined by the
label, - the
Layer, and - the
Type of area.
Each object is identified by its name shown in the object properties label. Use unique names for all objects that serve as resources in the value stream.
Use one layer for each of the objects you want to hide together or lock together against editing. In the next video you will see how it works:
The type of area is necessary for the evaluation function Area balance. Why you should pay attention to this object property, you can see in the video:
To finish this step in the tutorial please set the object properties Layer and Type of area for all the 3 machines as shown in the picture:

Step 4: Create dimensioned area objects from the block layout catalog
Beyond the operating equipment, there are peripheral areas for the arrangement of fixtures, tool cabinets, material bins, and, of course, areas for operation, maintenance and repair work, and for handling and bringing in all of these things. This creates area or space requirements around the operating equipment. In addition, there are layout areas for which no fixed operating equipment is to be provided (e.g. storage and buffer areas, paths, reserve areas). In order to model all this simply, one describes the periphery and similar spaces with the help of block layout objects. For the example layout you need block layout objects for
- the peripheries around the three operating resources (AP sawing, AP turning, AP grinding),
- a packing station,
- the goods receipt warehouse and
- the goods issue warehouse.
Practical planning tips:
- All resources and their peripheral objects, which stand in an inseparable technological connection, are summarized to one block each. If there is uncertainty about the block definition, it may help to ask whether the resources in question would all be moved together to the new location if they were to be moved, or whether it would also be possible to split them up into different locations without obvious disadvantages.
- Assign all blocks to a common layer. As a layer name for this the term “block layout” is generally well understood.
Drag required block layout objects from the default catalog Block Layout into the layout area and name them. This and what else the block layout objects can do is explained in the video:
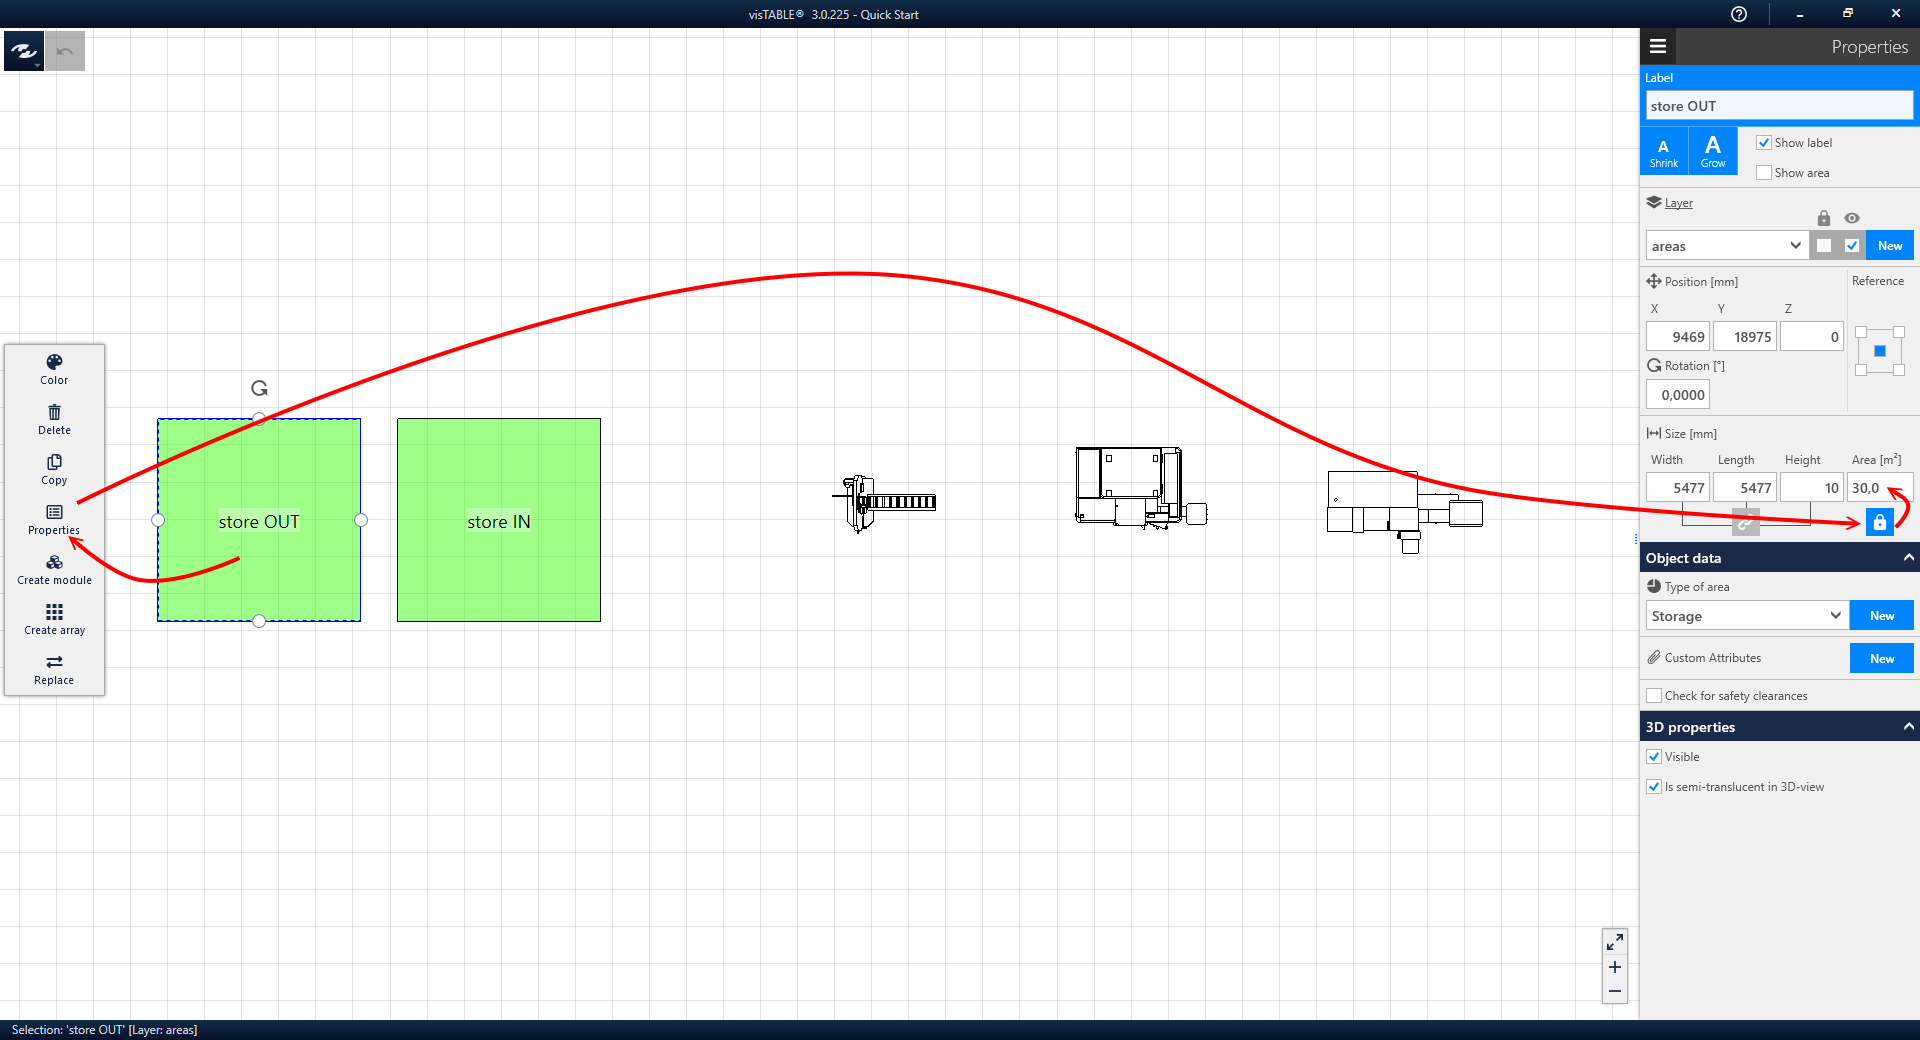
Start with one of the warehouses and color it green. The video explicitly shows how the coloring works:
Now please set the following properties for the warehouse:
Label: store INLayer: The Layer block layout is pre-determinedArea [m²]: 30Type of area: Storage
And now copy the store IN an rename the copy to store OUT. As you can see, this is an efficient method because all properties are transferred to the copy.
After that now please place the Workplace packing, color it blue, and set the following properties:
Label: WP_PackingLayer: The Layer block layout is pre-determinedArea [m²]: 10Type of area: Production
Step 5: Create area objects and periferal objects for the resources
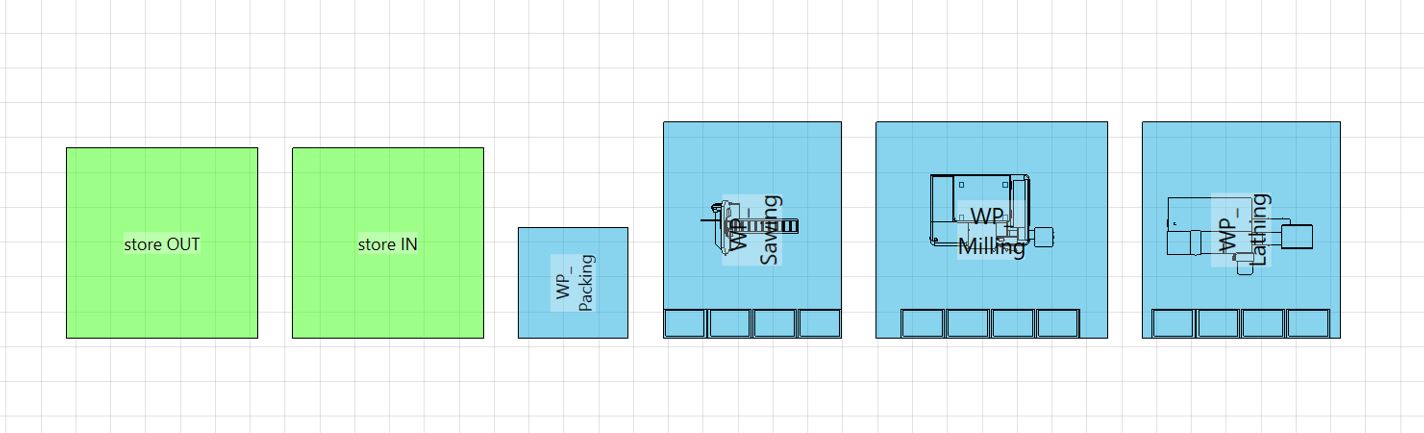
At last you place the block layout objects for the workstations. Use blue color too. Set the properties as shown here:
Label: WP_Sawing, WP_Milling, WP_LathingLayer: The Layer block layout is pre-determinedType of area: Production
No space requirement is specified for these workstations; the space requirement results from the need on workstation equipment. Four mesh box pallets are required per machine. Before positioning the containers, it is useful to lock the block layout layer so that the block layout objects are not moved accidentally. You will find the containers in the model library as shown in the next picture:
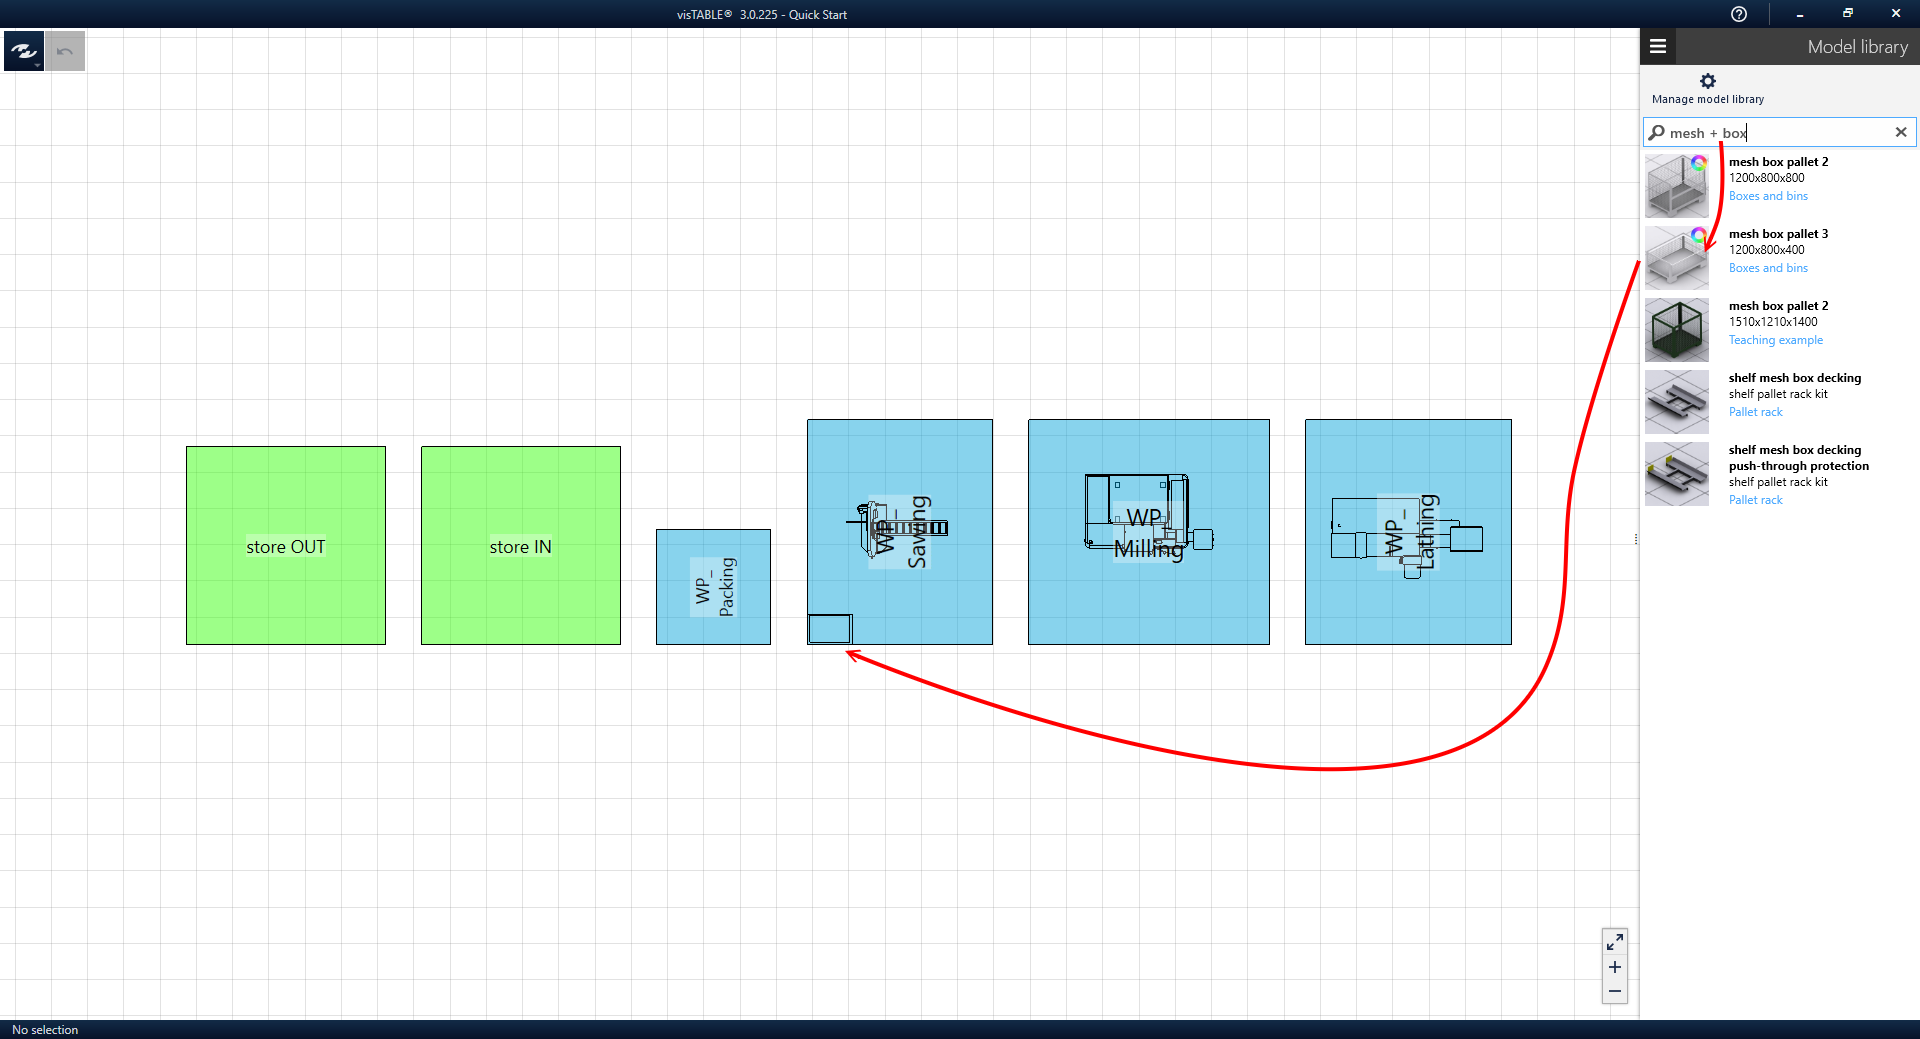
And now set the mesh box properties:
- Keep the
label, but switch off the check boxShow label. Layer: ContainersType of area: ignore
After placing the first mesh box we need 3 copies of it. To do this efficiently we ues the Create array command from the dynamic menu. How it works you will see in the next video.
Step 6: Align the layout objects to each other
When moving and scaling the objects, you may notice small green dots. These mark possible snap positions where objects can be joined together. For handling this so-called snapping you will find important hints in the following video:
To align and set defined distances between workplace equipment, you can use the Alignment function from the dynamic menu:
Step 7: Define object groups
If you want to move objects together group them. See in the next video how to group machines, block layout objects and workplace equipment:
Result of the tutorial
Are you satisfied with your result? So please save your work using the Save command from the system menu!
The question now is how to arrange the block layout optimally. Our next basic tutorial explains how this works in visTABLE®.
see also:
- What you should definitely know about Factory Planning (visTABLE®Blog)
- What is a block layout useful for in factory planning (visTABLE®Blog)