Area balance
Use this function to display key figures regarding the area consumption of the layout. The total of the categories ‘manufacturing’ and ‘assembly’, for example, results in the value-adding area. In contrast to calculations in Microsoft® Excel or interrogations of an ERP system, the area balance provides the actual areas in accordance with the current arrangement of the objects in the layout.
Area types
- Each object of the layout can be assigned an area type.
- The objects of the standard model library are already assigned area types by default.
- The area type of an object can be adapted via its properties.
- The default area type of a model can be specified by way of the visTABLE®ObjectManager.
General notes
- Areas to which more than one object is assigned are assigned proportionally to the corresponding area types.
- If objects of the type
Unspecifiedoverlap with another area type, nothing is added toUnspecifiedand everything to the other area type. - The
Ignorearea type is not taken into account in the area balance.
- If objects of the
Ignoretype overlap with another area type, everything is added to the other area type. - If an area comprises only an object of the
Ignoretype, this area is output in the area balance completely as aOpen space.
- If objects of the
- The area balance is determined with an accuracy of 0.1 m². The tolerance range is specified with +/- 0.1m². Consequently, any deviations within this range are to be interpreted as due to the measuring technology.
- The visibility of a layer has no influence on the area balance. Invisible objects are also taken into account in the area balance.
Creating an area balance
Proceed as follows to calculate an area balance and view the details.
Prerequisites
- An area balance can only be created if the layout comprises objects with an area type assigned.
- An area balance is based on a reference area. If a reference area has not yet been created, this is done automatically by calling the
Area Balancefunction. Only areas of the layout which are located within the reference areas are taken into account in the area balance.
Procedure
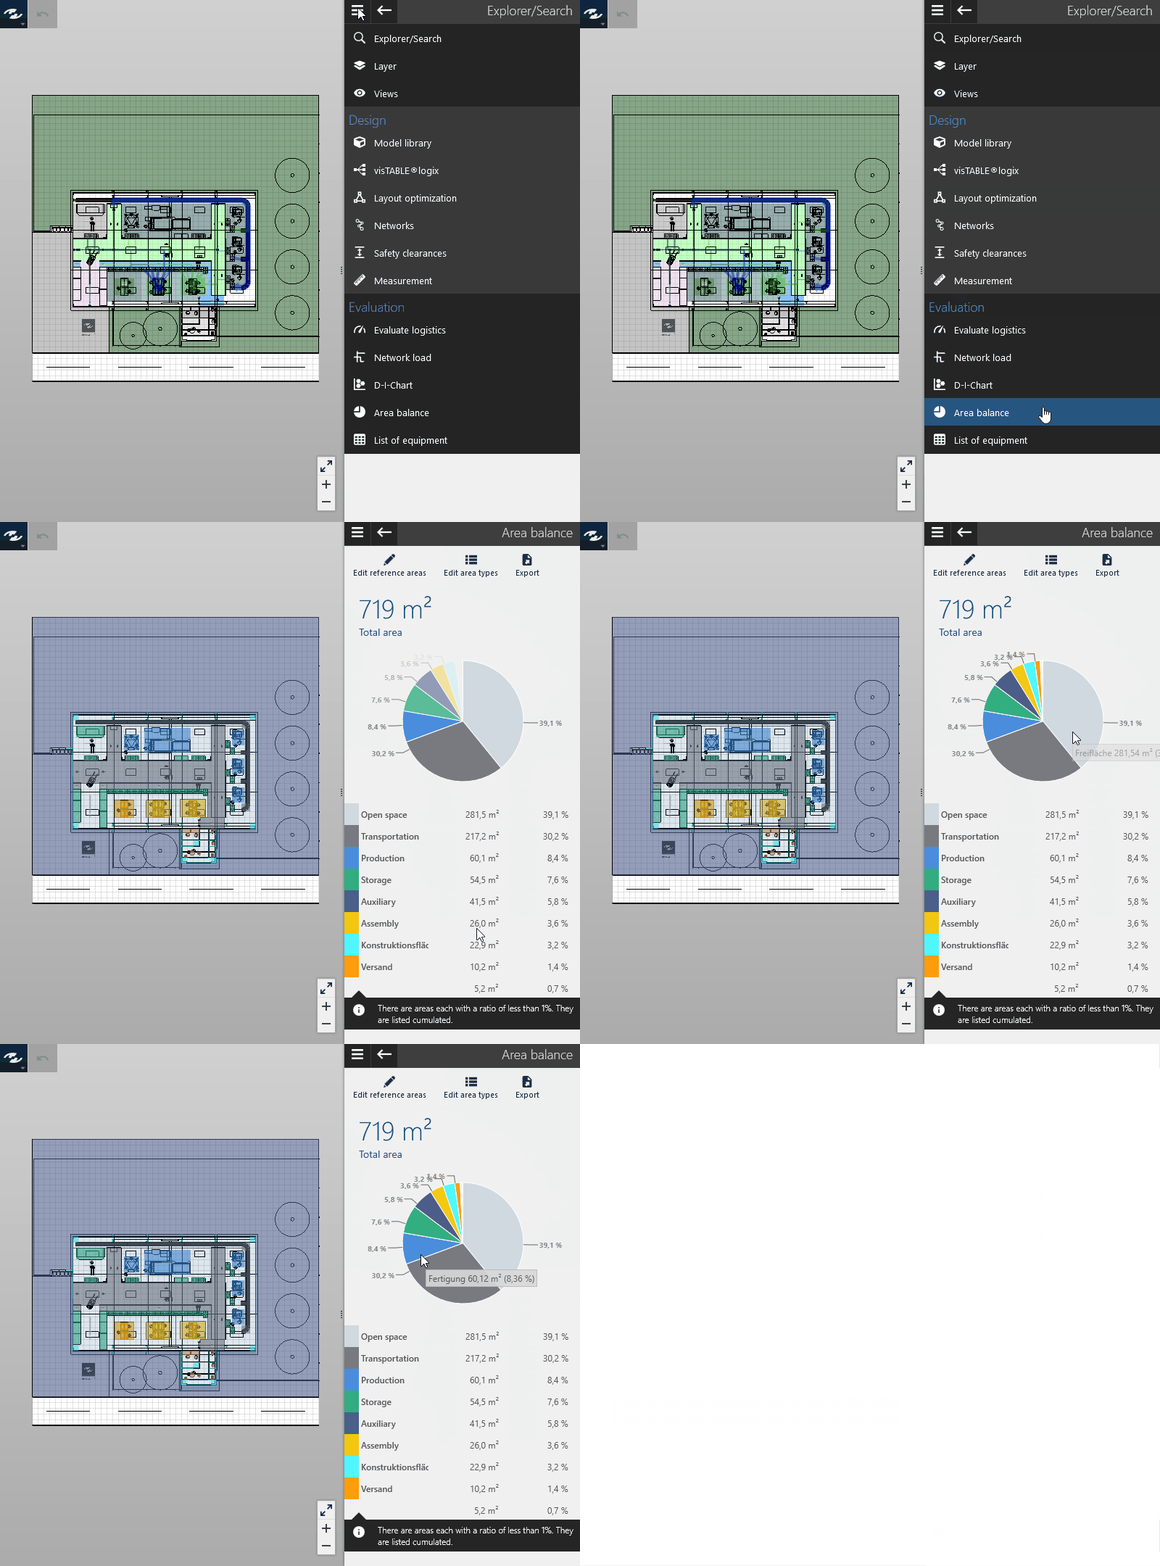
- Switch to the task area
Evaluation>Area Balance. - The calculation is started automatically. The result is displayed
- in the Task and Tool Arera as a diagram and a table,
- in the Layout Area by coloring the objects in accordance with the area types.
- in the Task and Tool Arera as a diagram and a table,
Adapting a reference area
The area balances are calculated in accordance with one or several areas. Such an area is called reference area. The specifications as a percentage use the total of the area of the these reference areas as the initial value. Reference areas are created by visTABLE®touch as standard automatically. They comprise the rectangle enclosing all objects at the given time. You can adapt, add new or remove reference areas. All reference areas can generally be adapted similarly to polygons of the layout.
Proceed as follows to adapt a reference area.
Procedure
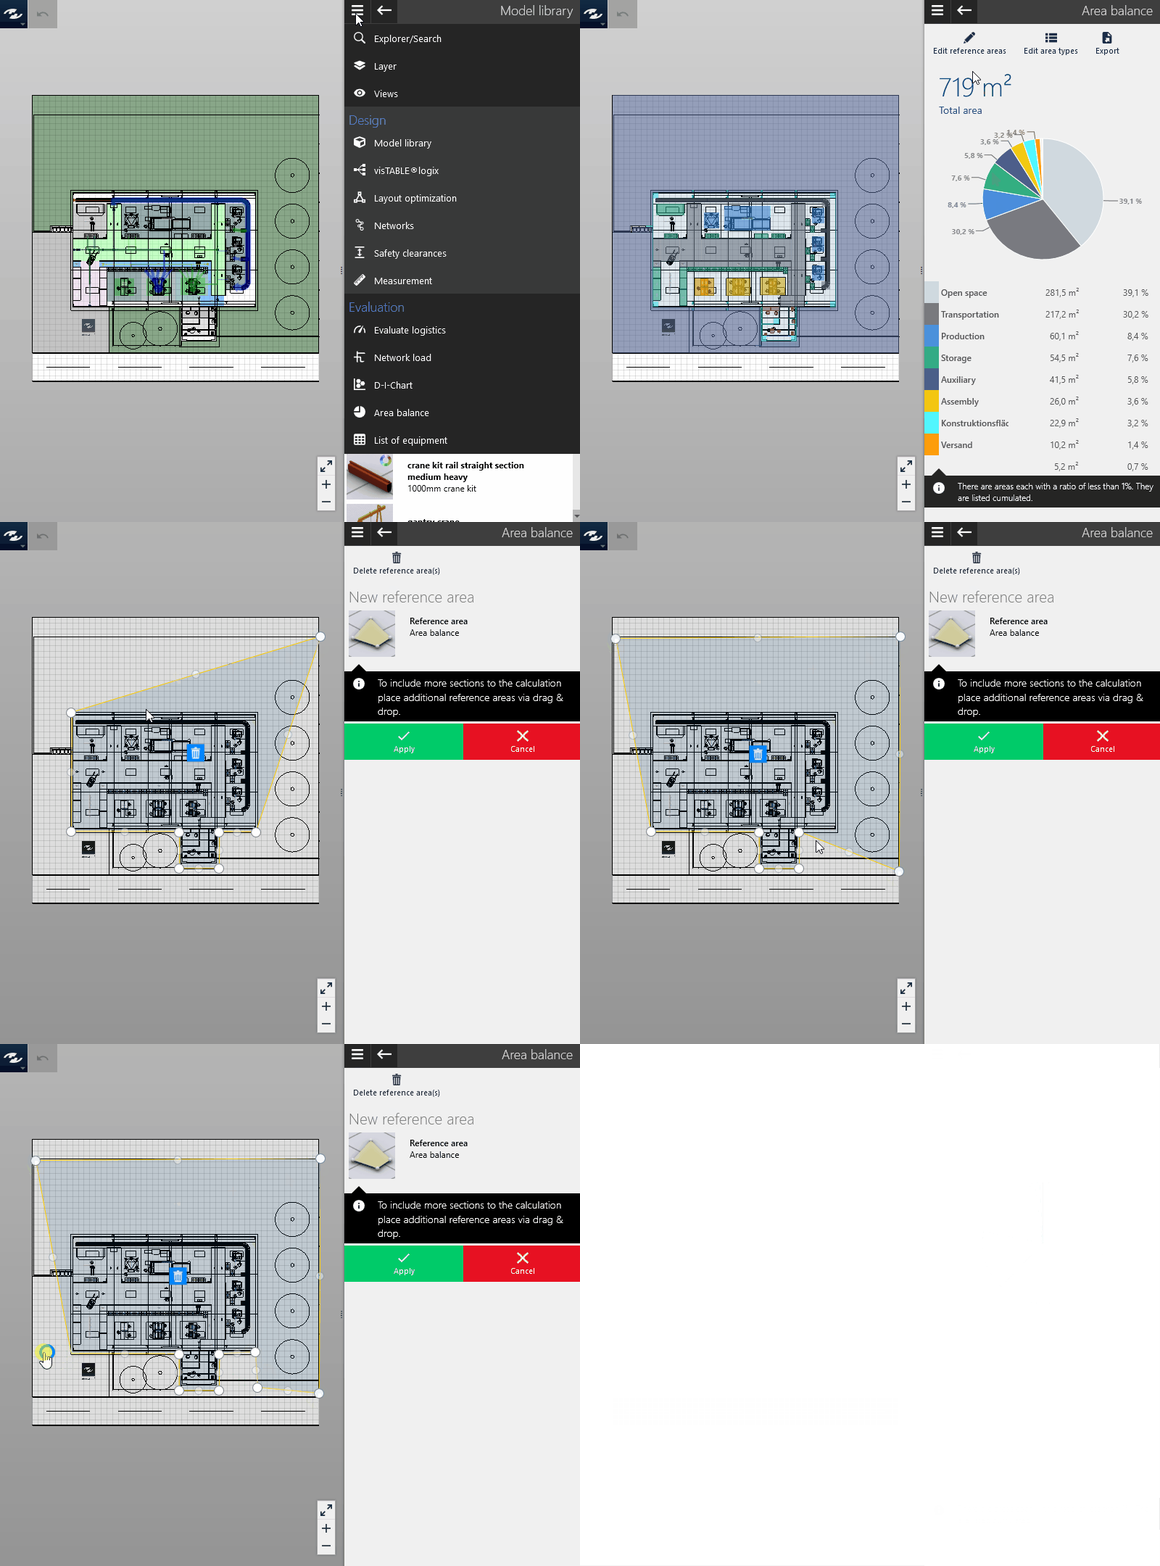
- Switch to the task area
Evaluation>Area Balance. A new area balance is calculated by the software in accordance with the current layout. Areas not taken into account in the area balance are hidden. - Click on
Edit Reference Area. The reference areas are highlighted. Each supporting point of a reference area is represented in the form of a small adorner (white circle) which can be used to modify it. - Click on a supporting point.
- Press and hold down the mouse button and drag the supporting point to the desired position while holding down the mouse button.
- Release the mouse button to place the supporting point at the desired position.
- Use the same procedure for all further supporting points.
- In the task area, click on
AcceptYour changes are immediately taken over in the new area balance and the result is displayed.
Adding a reference area
Proceed as follows to create a new reference area and place in the layout.
Procedure
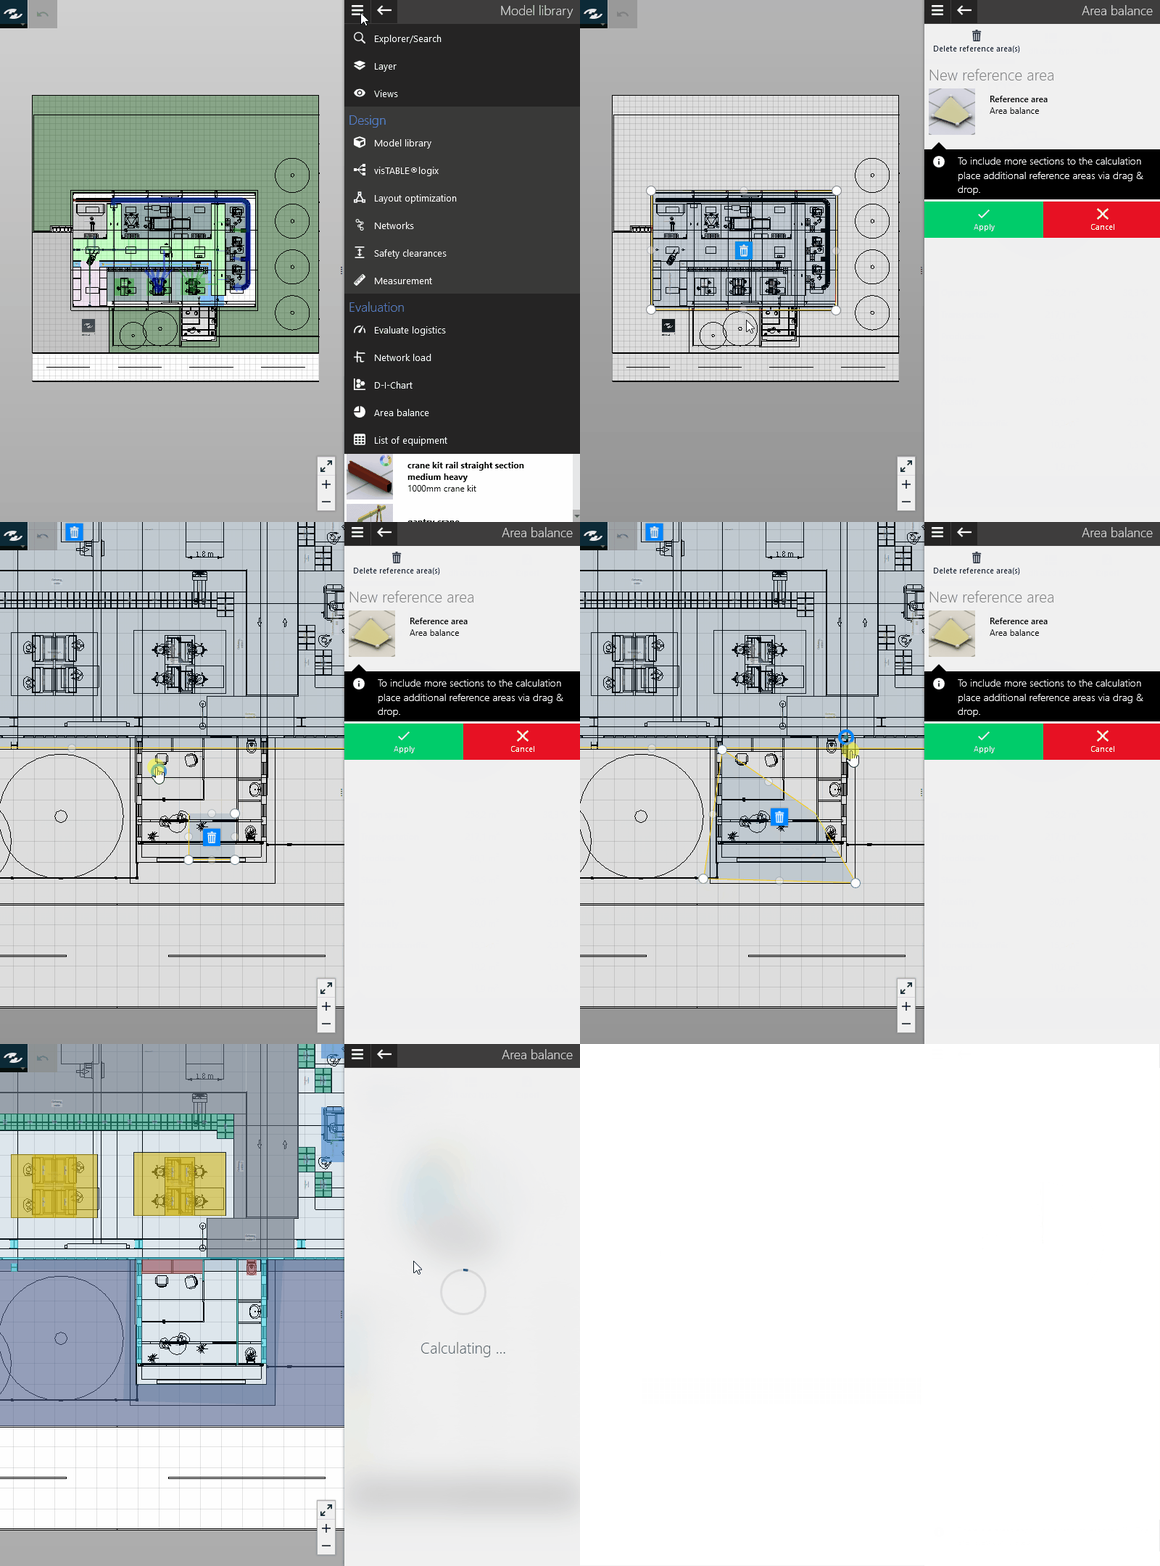
- Switch to the task area
Evaluation>Area Balance. - Click on
Edit Reference Area. - In the task area, click on the symbol for a new reference area.
- Use the drag-and-drop method to place a new reference area in the layout to the desired position.
- Use the adorner to modify the newly created reference area according to your requirements.
- In the task area, click on
Accept. Your changes are immediately taken over in the new area balance and the result is displayed.
Deleting a reference area
Proceed as follows to delete a reference area.
Procedure
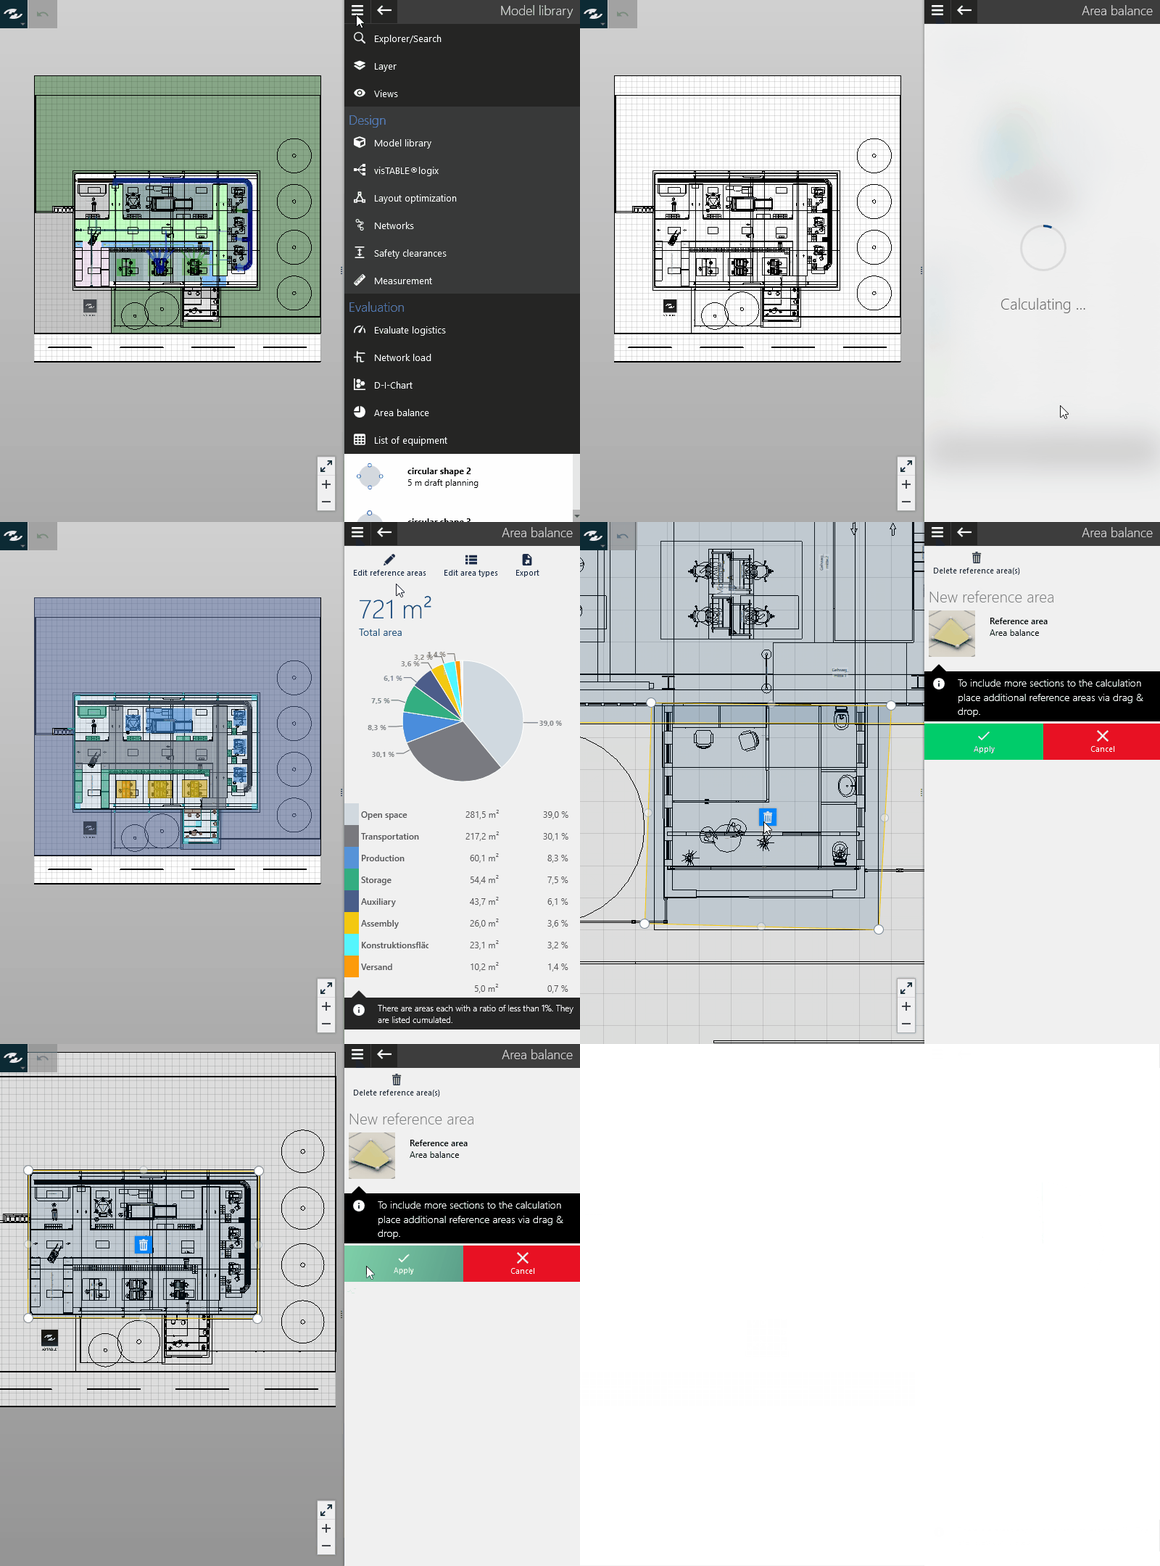
- Switch to the task area
Evaluation>Area Balance. - Click on
Edit Reference Area. The reference areas are highlighted. Reference areas can be deleted by way of the recycle bin. - In the layout area, click on the recycle bin icon for the reference area you wish to delete.
- In the task area, click on
Accept. Your changes are immediately taken over in the new area balance and the result is displayed.
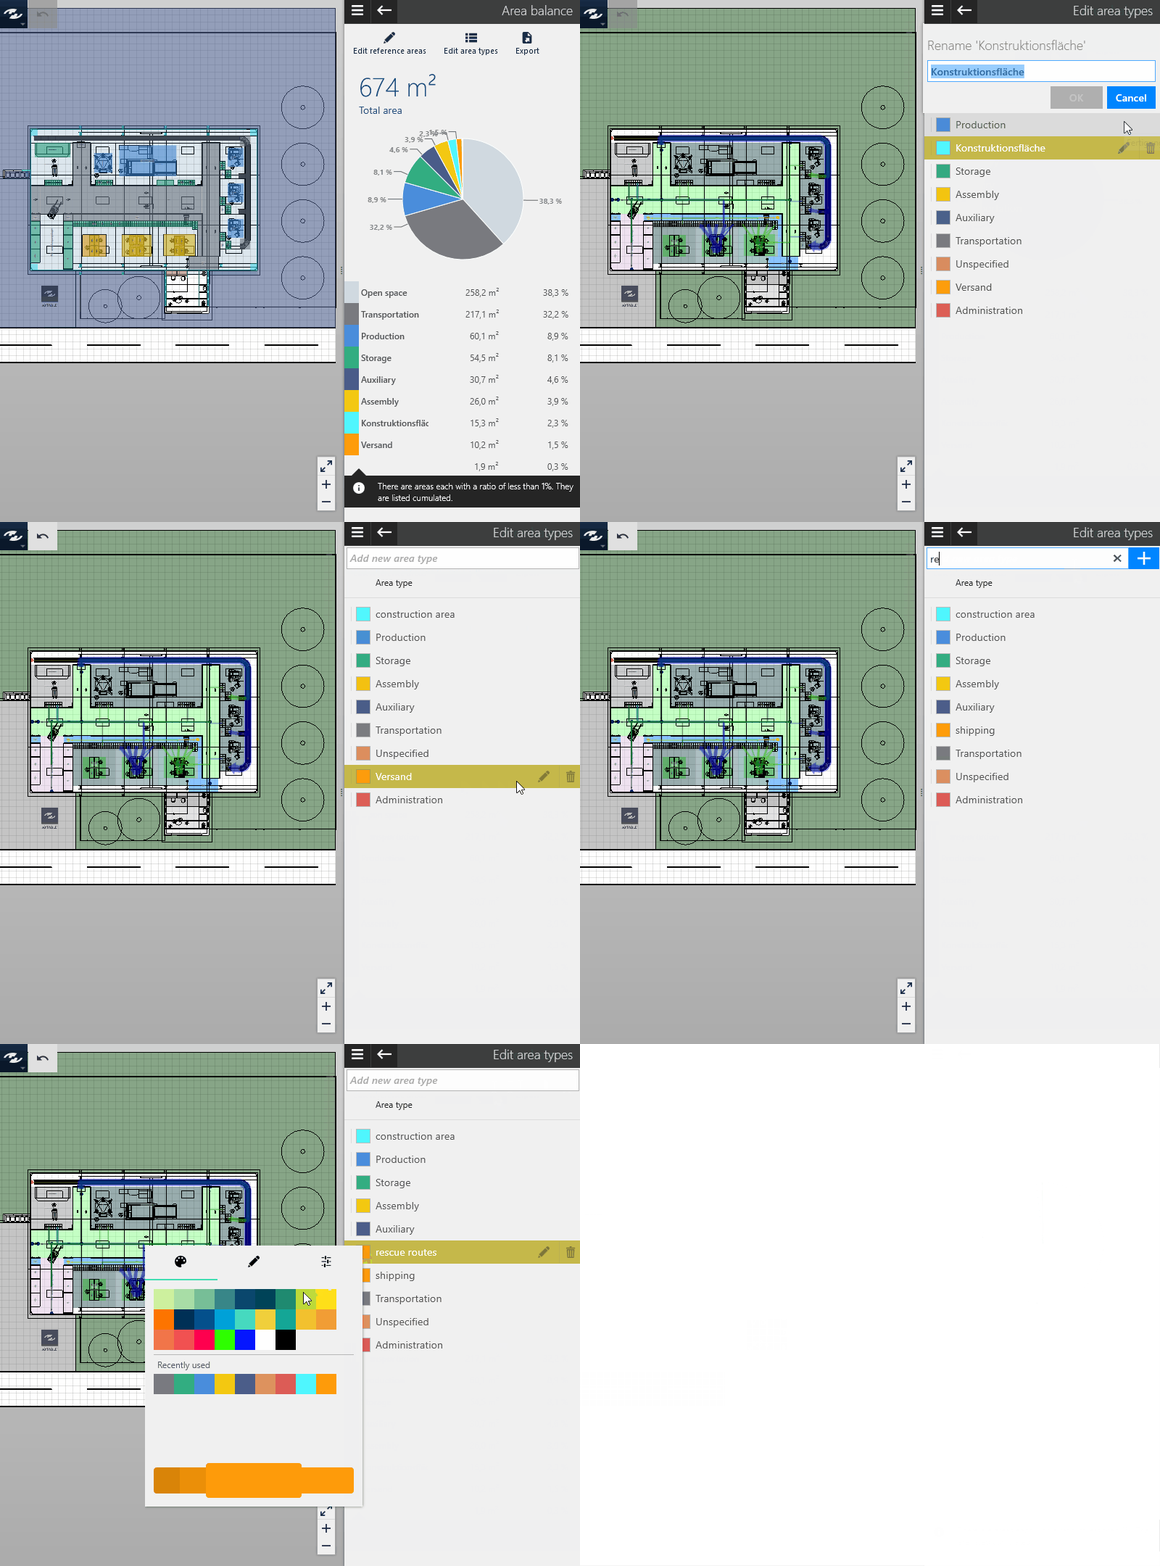
Edit area types
When assigning an area type to an object, you can choose from an existing set of area types. Use this function to limit this set or to extend it with your own area types. In this way you can also adjust the color value of the area types according to your own specifications or rename area types.
Procedure
- Switch to the task area
Evaluation>Area Balance. - Click on
Edit area types.
You’ll se a list of all available area types. - Select an entry in the list and choose from one of the commands:
Rename(pencil icon),Delete(recycle bin) or set a color value by clicking/tapping on the colored field of the entry.
Hints
If there are objects in the layout that are assigned to an area type, the area type cannot be deleted. If necessary, use the Layout Explorer to identify the corresponding objects and assign a different area type to them.