Dimensioning
The “Dimensioning” function can be used to determine and document distances between points. Possible areas of application are the creation of the fine layout or the specification of defined distances between objects. The dimensions can be printed. It is possible to hide the dimensions (temporarily) for the sake of clarity. If instead you want to arrange two objects at a defined distance from each other, use the Alignment: Change spacing function.
visTABLE®touch can only create linear dimensions. A distinction is made between horizontal, vertical and aligned linear dimensions. 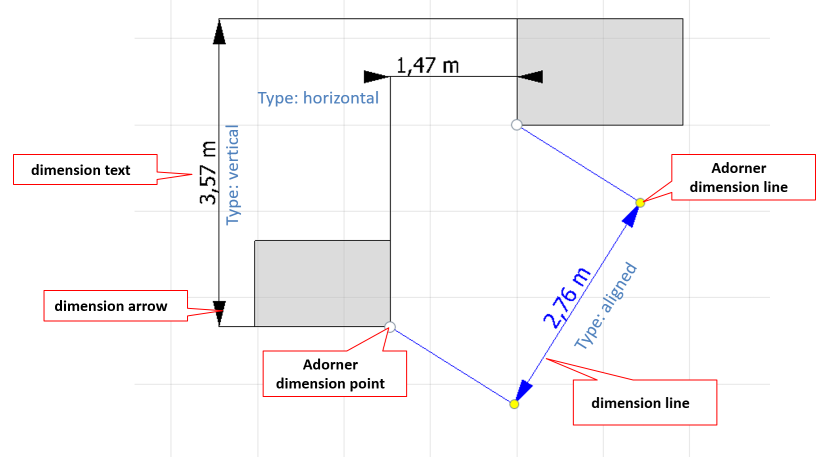
Dimensioning types
Horizontal:
The length of the extension line is specified by the measure. It corresponds to the distance between the extension lines. After dropped from the model library, the extension line is parallel to the x axis.Vertical:
The length of the extension line is specified by the measure. It corresponds to the distance between the extension lines. After dropped from the model library, the extension line is parallel to the y axis.Aligned:
This measure specifies the distance between the two nodes (each on the end of the extension line). The extension line always runs parallel to the two nodes.
Associated dimensions
Dimensions can be associative. This means that the dimension is updated automatically once an element with which a dimension is linked is modified.
Dimensions in 3D view
Dimensions created in the layout area are not linked with the 3D view and are also not displayed there. Instead, the Measure function is provided in 3D view.
How to handle dimensions
- New dimensions are created via the task area
Design>Dimensioning. - Existing dimensions can be selected and then modified.
- Dimensions should preferably be modified by way of the nodes.
- It is also possible to move dimensions separately. If the dimensioning is linked with an element, the link is canceled when moving the dimensioning. In contrast, associative dimensions are also always updated when one of the linked elements is modified.
- It is also possible to select dimensions with other elements. Correspondingly, when moving and rotating dimensions together with their linked elements, the links are preserved.
Measurement units
Under Layout properties the unit of measurement to be used (m or mm) can be set. If the automatic definition of the unit of measurement is activated there, all dimensions < 10 m are displayed in the unit mm.
Creating dimensions
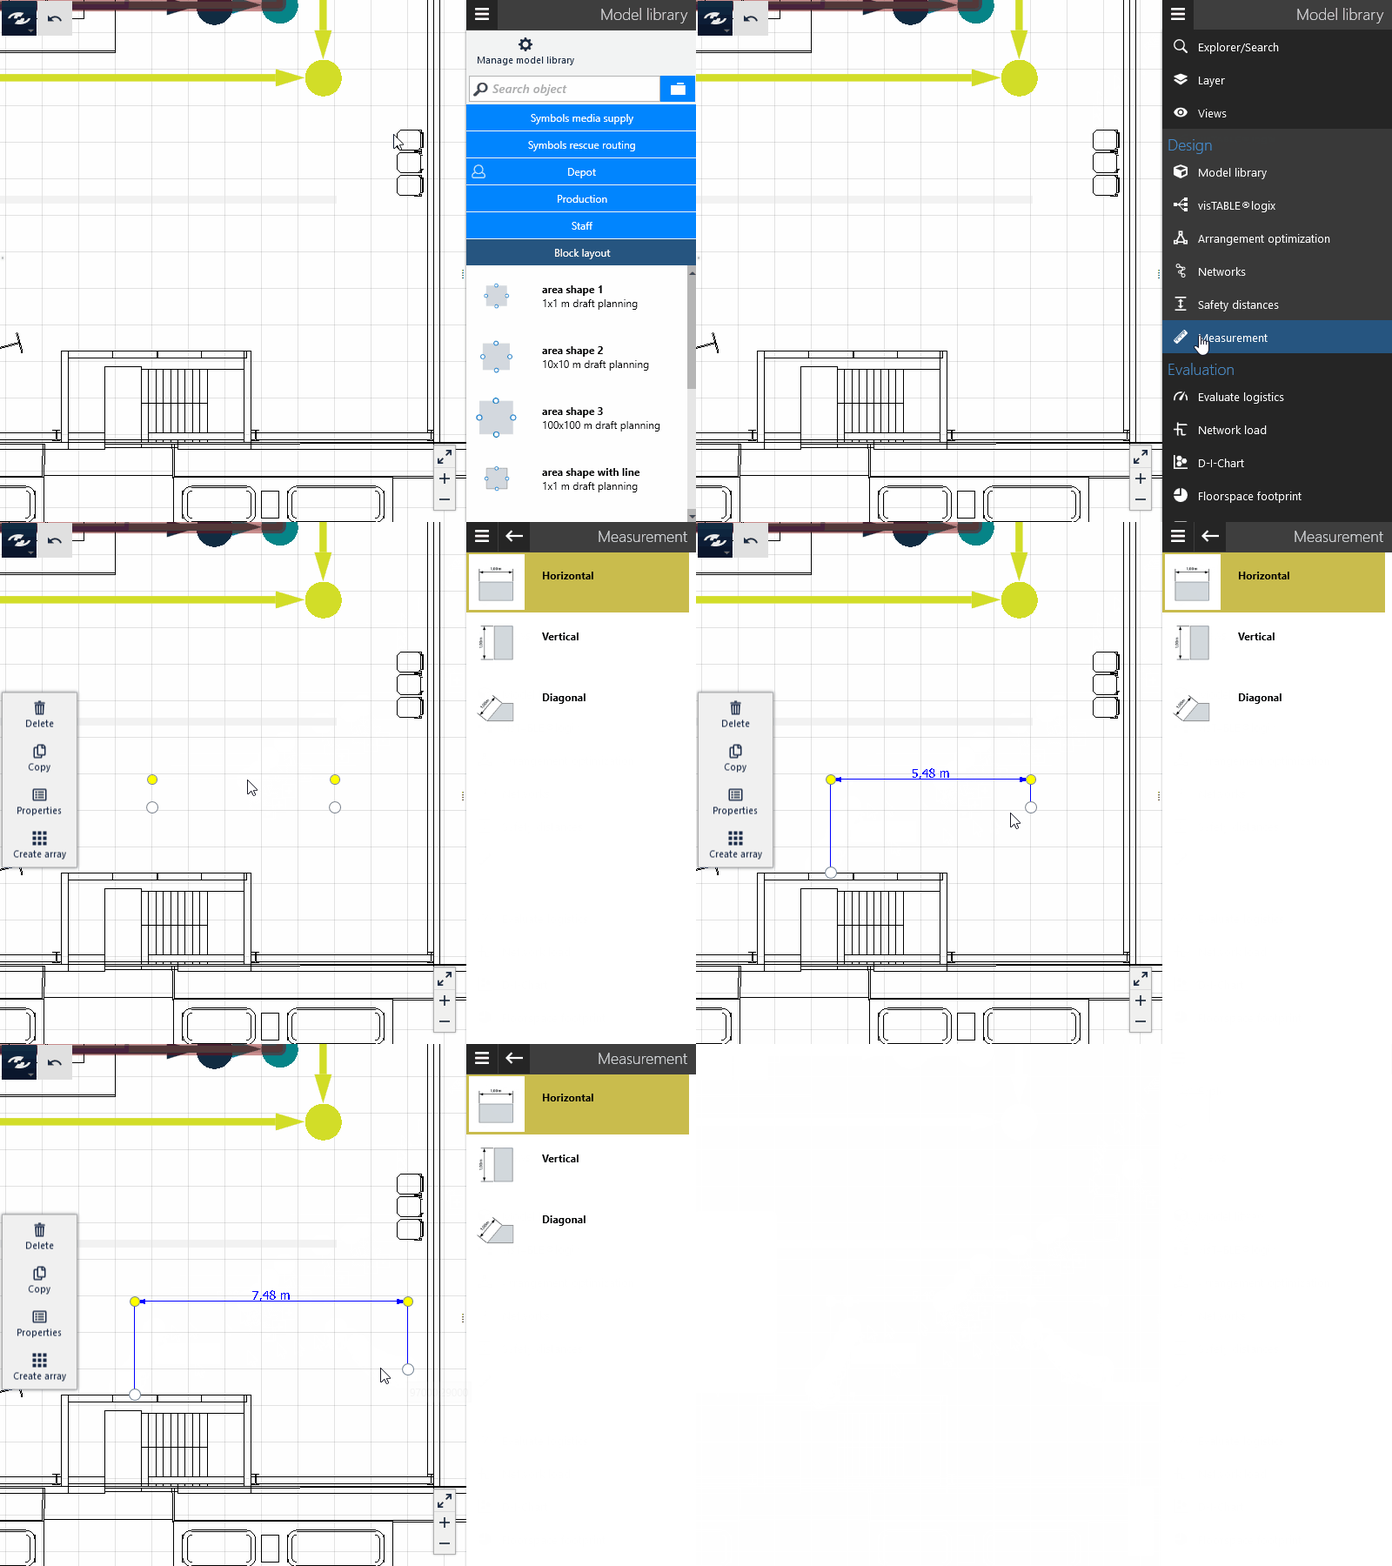
To determine the distance between any of two points in a layout by way of a linear, horizontal dimensioning, proceed as follows.
Procedure
- Switch to the
Design>Dimensioningtask area. - Click on the
Horizontalentry. - Press and hold down the mouse button and drag a horizontal dimension to the layout area.
- Release the mouse button. A horizontal dimension is created and selected in the layout.
- Click and drag the white adorner on the end of the extension line to the first point to be assigned dimensions.
- Click and drag the white adorner on the end of the other extension line to the second point to be assigned dimensions.
- Click and drag one of the yellow adorners to position the extension line.
- The distance between the two extension lines is displayed at the measure line. This corresponds to the horizontal distance between the two points to be assigned dimensions.
Creating associated dimensions
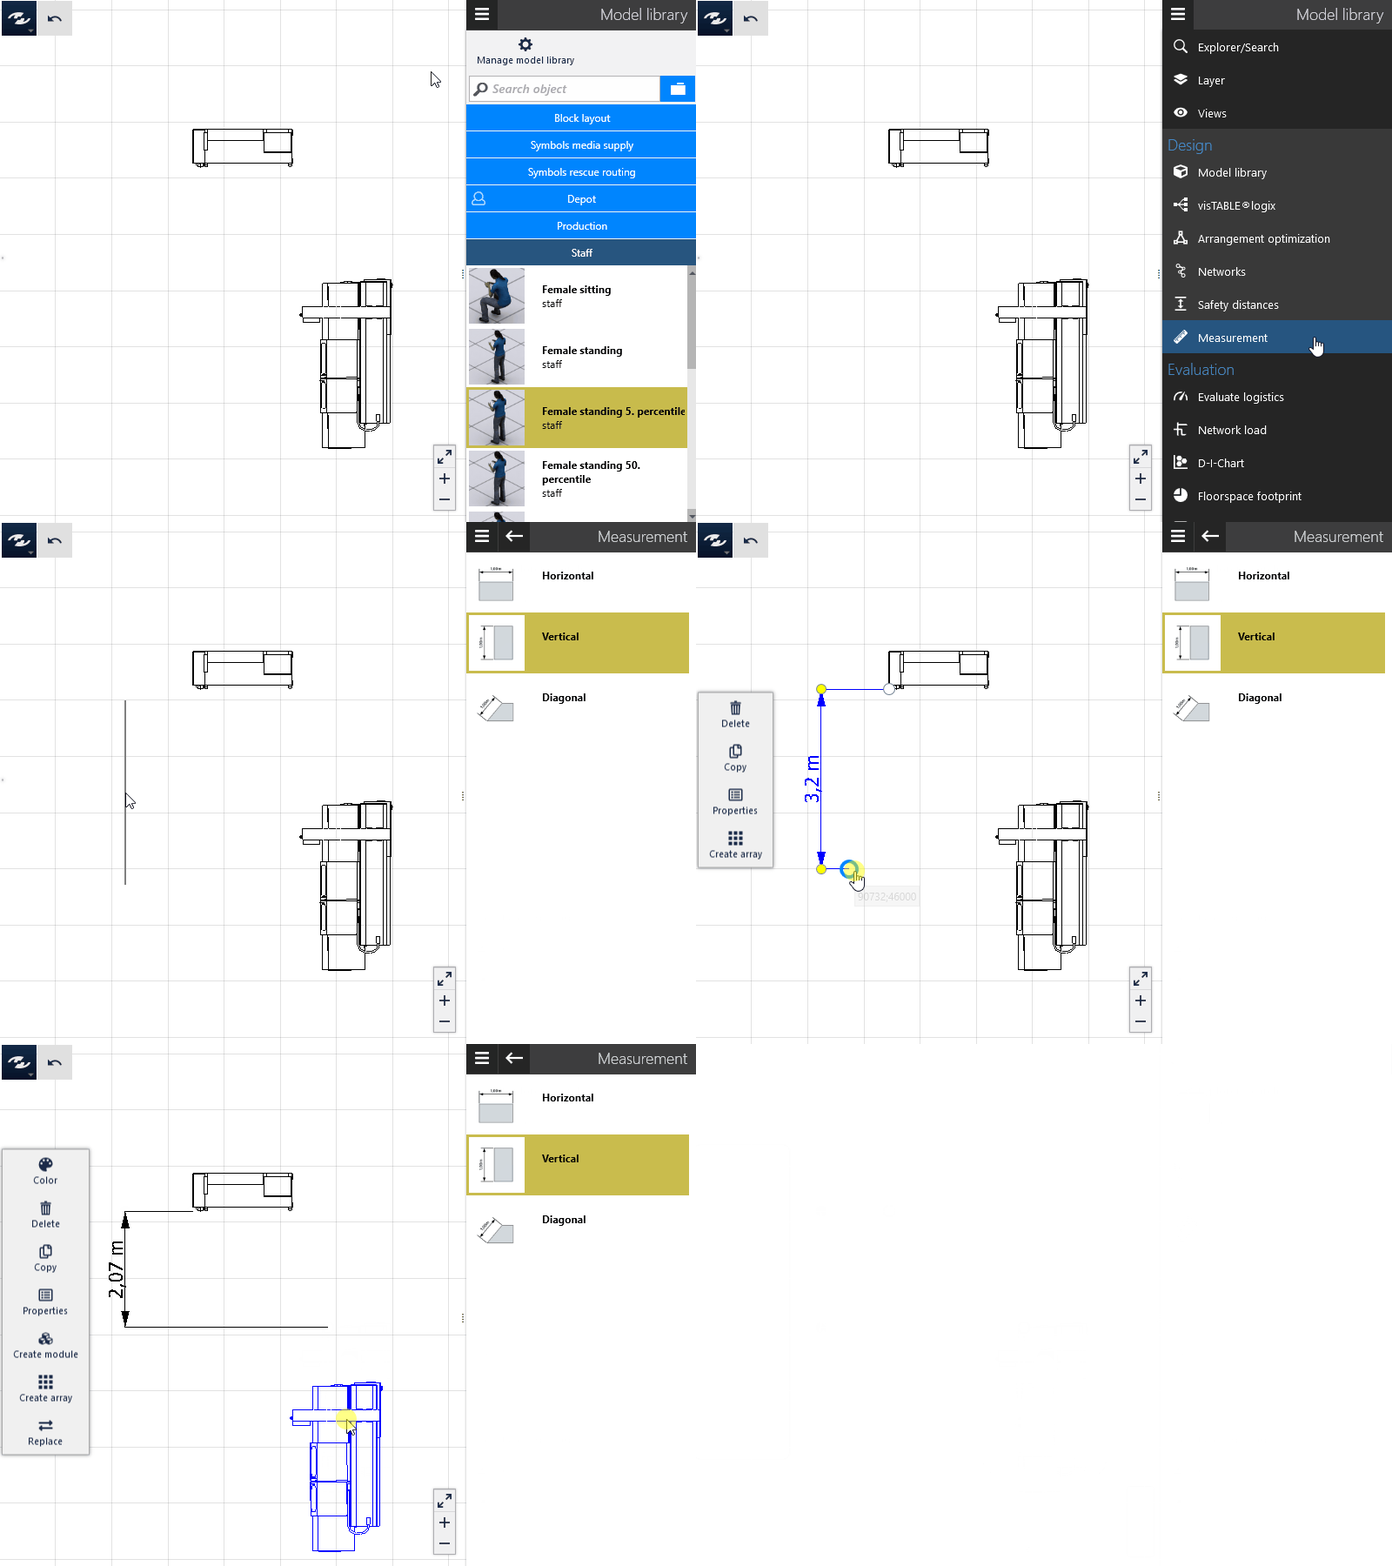
To determine the offset between two objects and link this dimensioning with the two objects to update the dimension if you modify one of the objects, proceed as follows.
Procedure
- Modify your image section such that you can see both objects to be assigned dimensions.
- Switch to
Design>Dimensioning. - Click on the
Verticalentry. - Press and hold down the mouse button and drag a vertical dimensioning to the layout area.
- Release the mouse button. A vertical dimensioning is created and selected in the layout.
- Click and drag the white adorner on the end of an extension line to the point of the first object to be assigned dimensions. While moving, the adorner is highlighted by way of a green point to indicate that the dimensioning can be associated with the object.
- Release the adorner. The adorner is associated with the object.
- Click and drag the white adorner on the end of the other extension line to a point of the second object to be assigned dimensions.
- The distance between the two extension lines is displayed at the measure line. It corresponds to the offset between the two points of the objects.
- Move one of the objects. The associated point and the dimension are updated automatically.
Creating aligned dimensions
To determine the distance between two points by way of an aligned dimensioning, proceed as follows.
Procedure
- Switch to
Design>Dimensioning. - Click on the
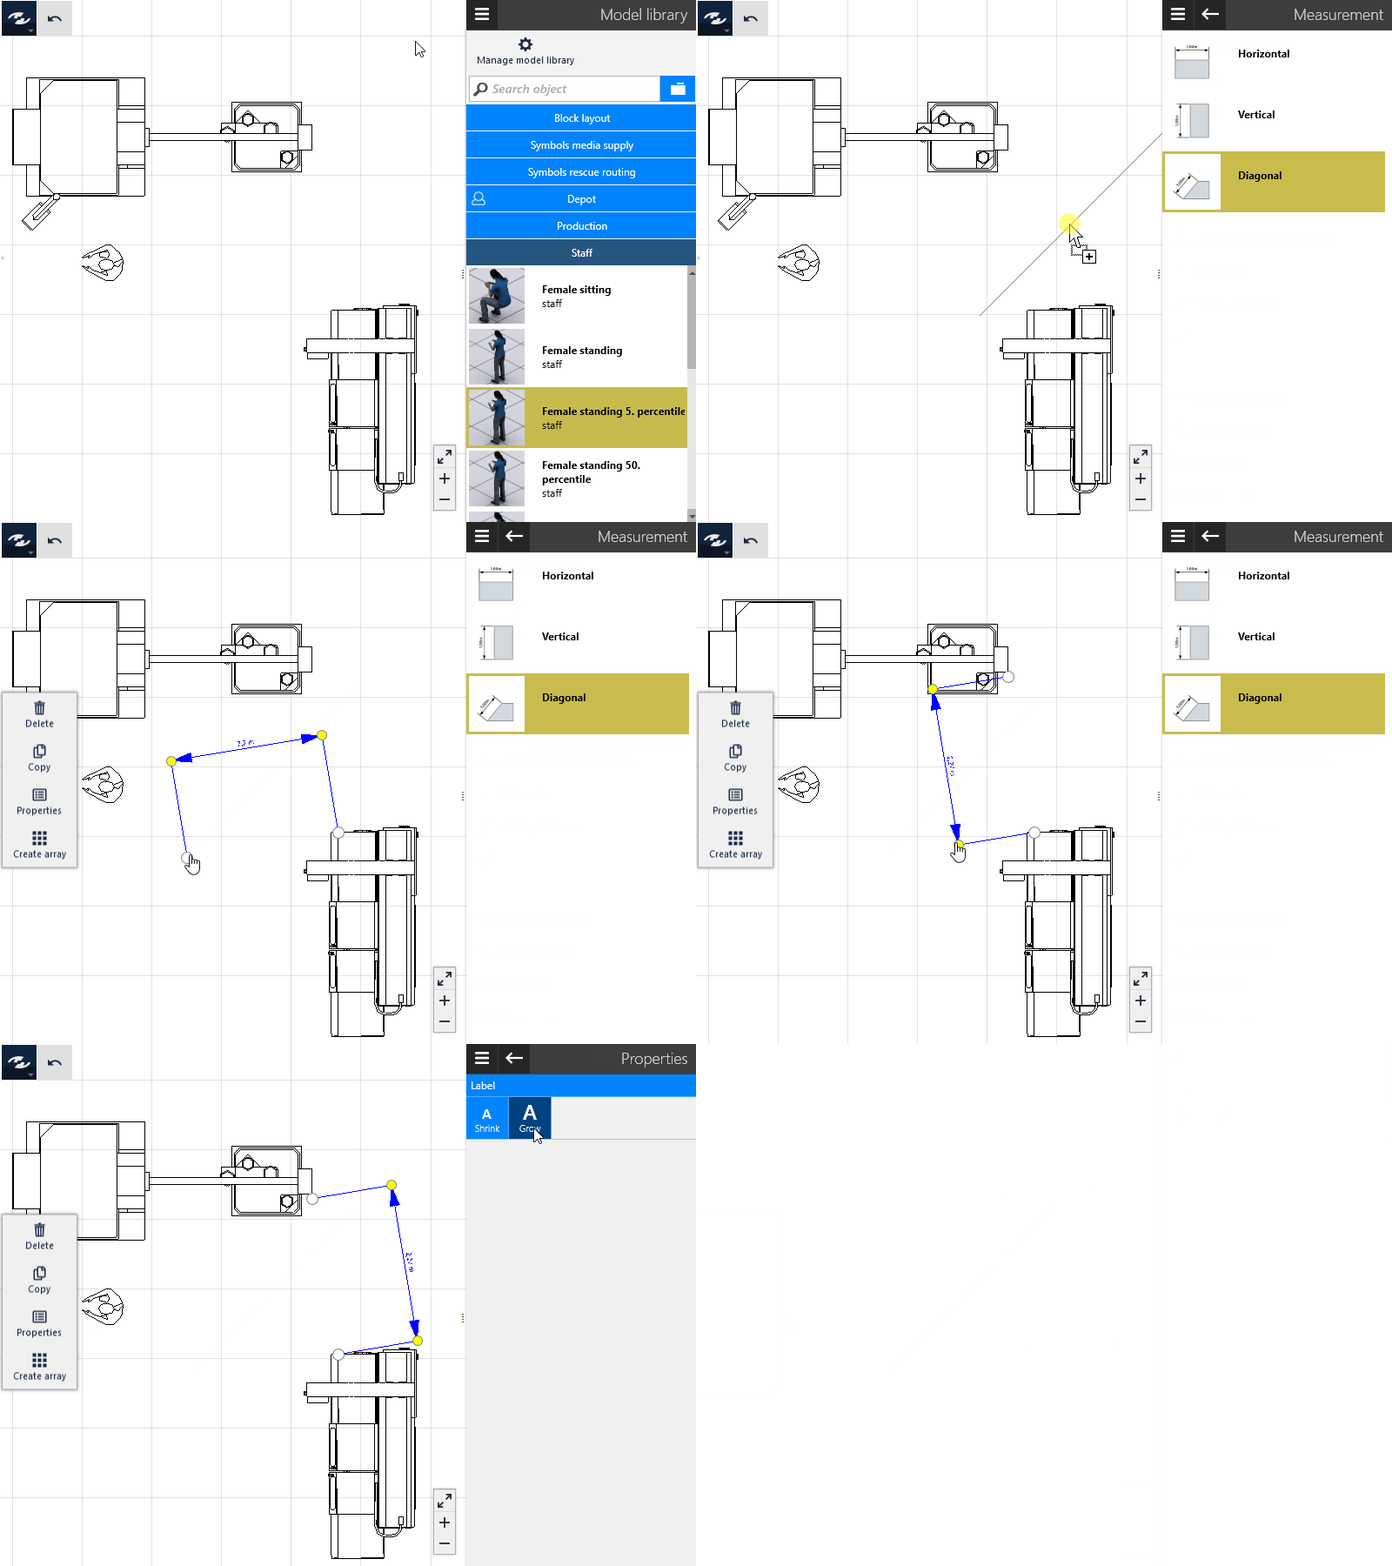
Alignedentry. - Press and hold down the mouse button and drag an aligned dimensioning to the layout area.
- Release the mouse button. An aligned dimensioning is created and selected in the layout.
- Click and drag the white adorner on the end of the extension line to the first point to be dimensioned.
- Click and drag the white adorner on the end of the other extension line to the second point to be dimensioned.
- The distance between the two points is displayed at the measure line. The extension line is automatically adapted such that it runs parallel to a (imaginary) straight line through the two points.
- Click and drag one of the yellow adorners to position the extension line.
Showing and hiding dimensions
Dimensions can be shown or hidden all together. It is not possible, however, to hide individual dimensions. If a dimensioning is linked with an object, the dimension is hidden automatically if at least one object linked with it is hidden. If all linked objects of a dimension are shown, the dimension itself is also shown.
Proceed as follows to show or hide all dimensions.
Procedure
- Switch to the
Layertask area. Among the controls at the bottom, you will find theDimensionsswitch. It indicates which dimensions can currently be hidden or shown. - Click on the
Dimensionsswitch to show or hide them.
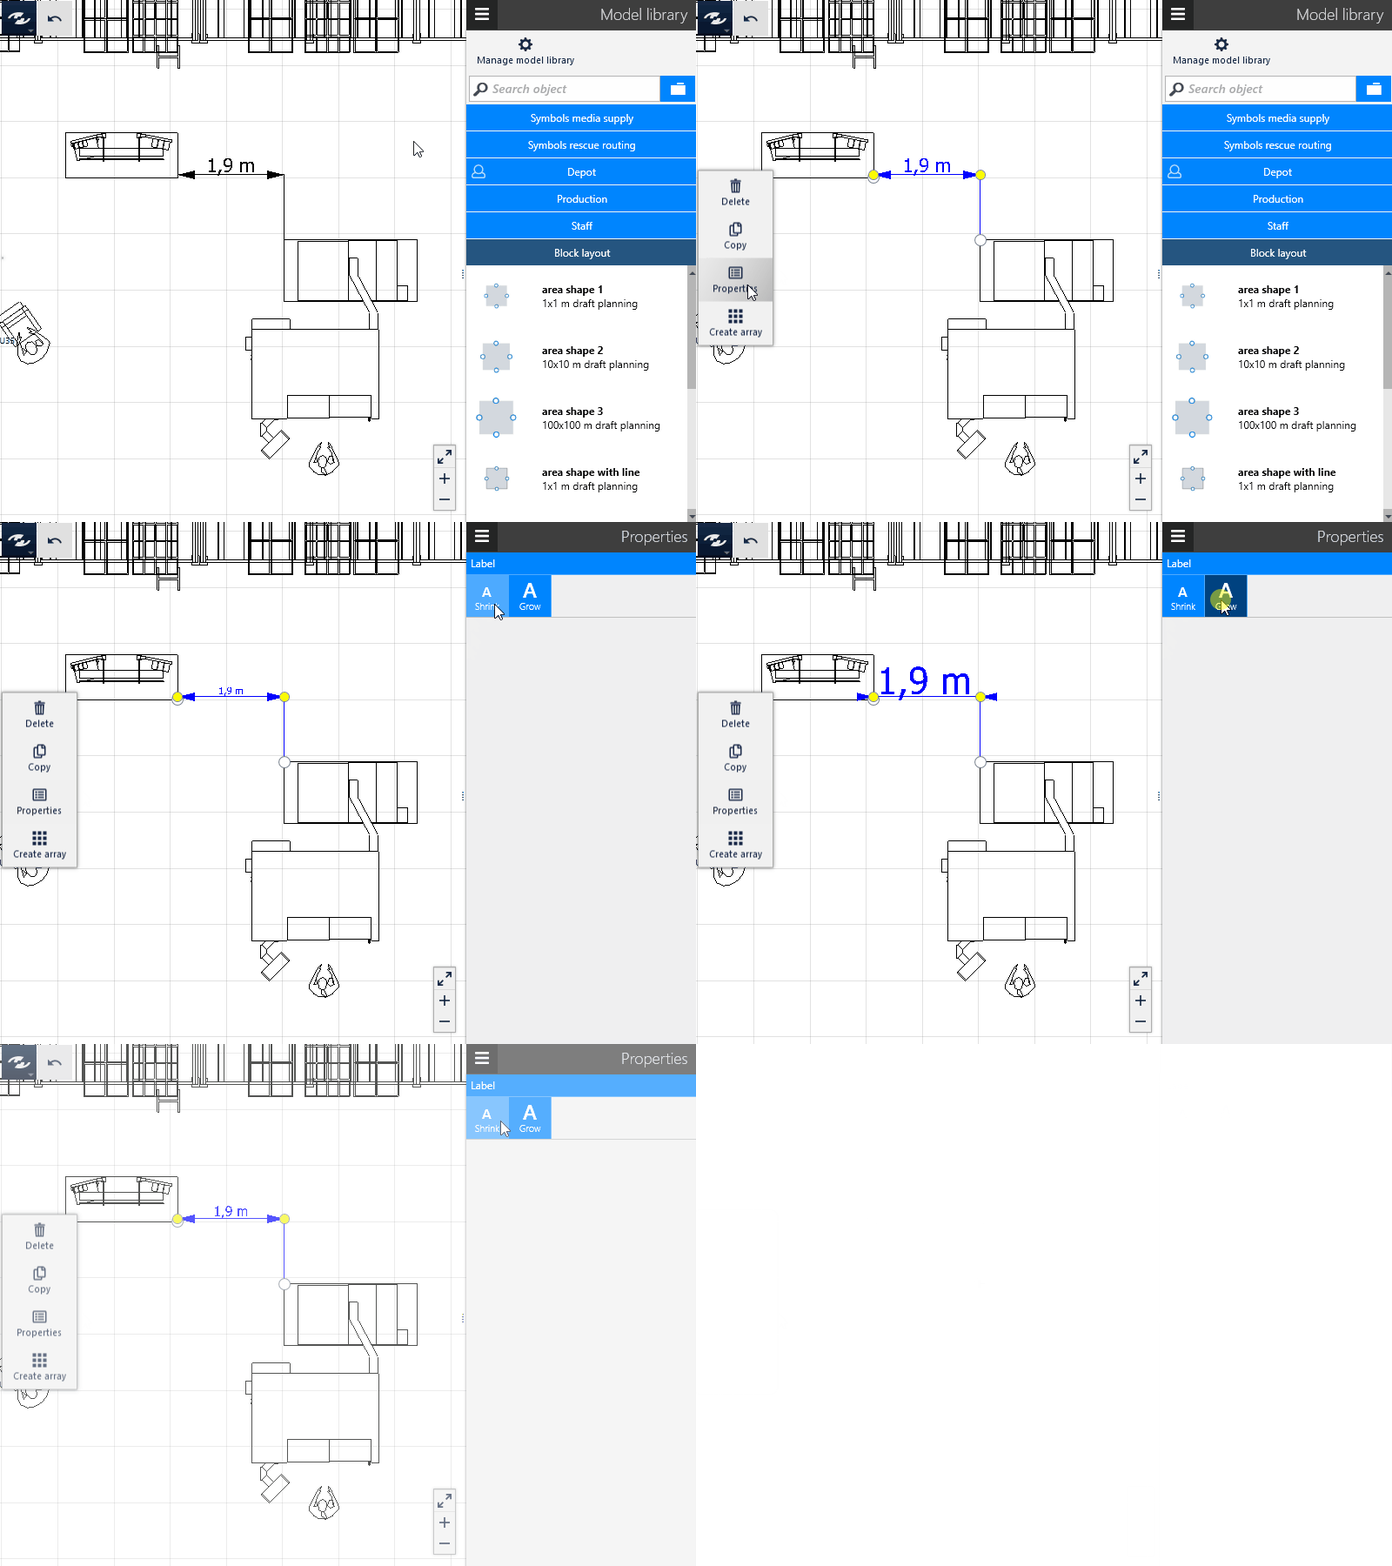
Modifying the font size
To create a dimensioning, use the drag-and-drop method. In this action, the initial length is automatically adapted such that the dimensioning can be seen in the selected section completely. It is not possible to vary the size of dimensioning arrows or arrow heads. The length of the extension lines is controlled by way of the yellow adorners.
Proceed as follows to adapt the measure to a dimensioning.
Procedure
- Include a dimension in your selection.
- Select the
Propertiescommand in the dynamic menu. - Click on the
Smallerbutton to reduce the font size of the measure. - Click on the
Largerbutton to increase the font size of the measure.
