Alignment
The Alignment task area can be called from the Dynamic Menu if at least two objects are selected. In this area, several objects can be arranged to each other in the layout area in accordance with predefined rules. Only the x and y positions of the objects are changed; the z positions are preserved.
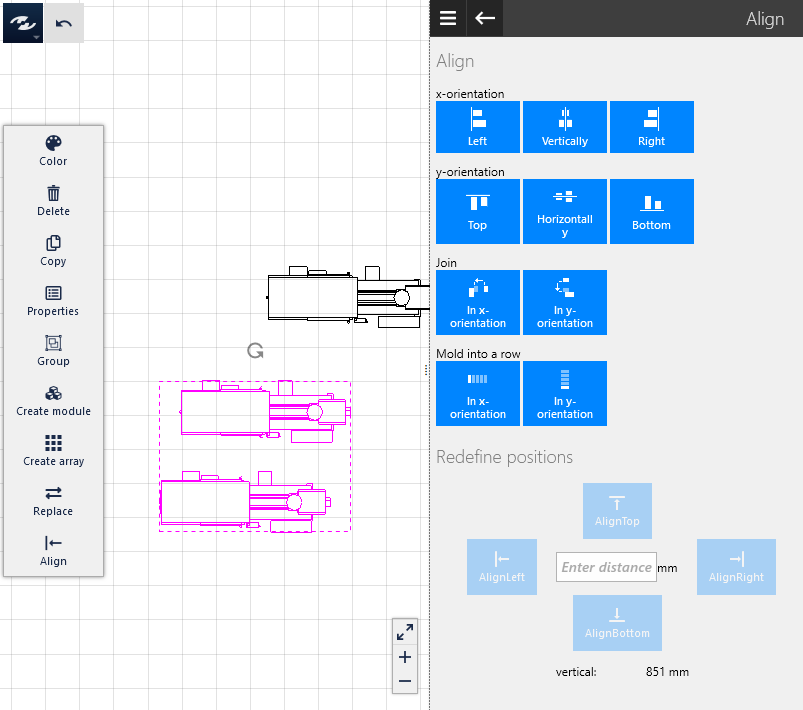
The following general possibilities are provided:
- Alignment and distribution in the x direction (horizontally)
- Alignment and distribution in the y direction (vertically)
- Joining and queuing
- Specifying the spacing between two objects
Tip
Groups are also considered as an object. In other words: Single objects and groups can also be aligned to each other.
Alignment in the x direction
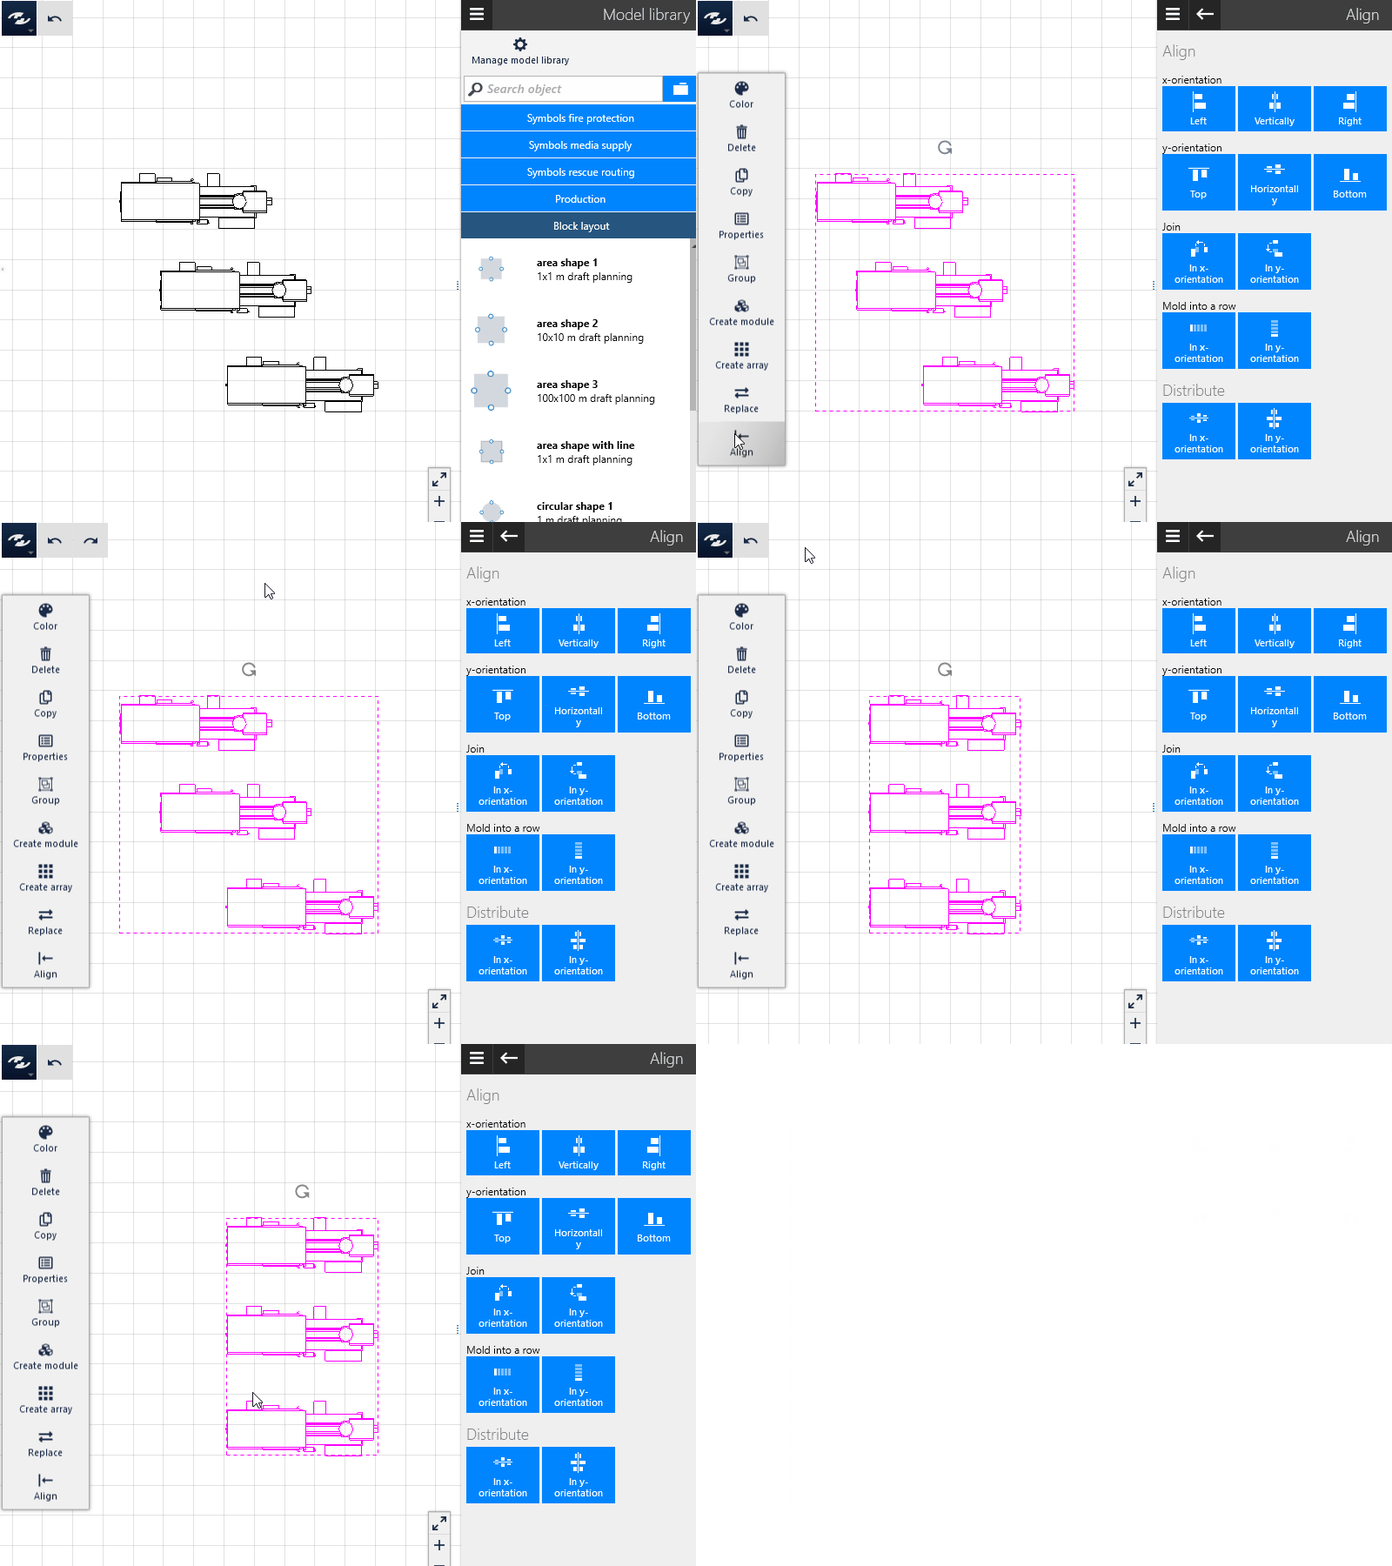
The selected objects can be aligned either to the left, center or right of the horizontal axis of the Layout Area.
- Irrespective of the order of selection, the left-most object is the base for Irrespective of the order of selection, the left-most object is the base for
Leftalignment, and the right-most object if you selectRight. - If you select central alignment (
Center horizontally), the object is aligned centrally to the selection.
Alignment in the y direction
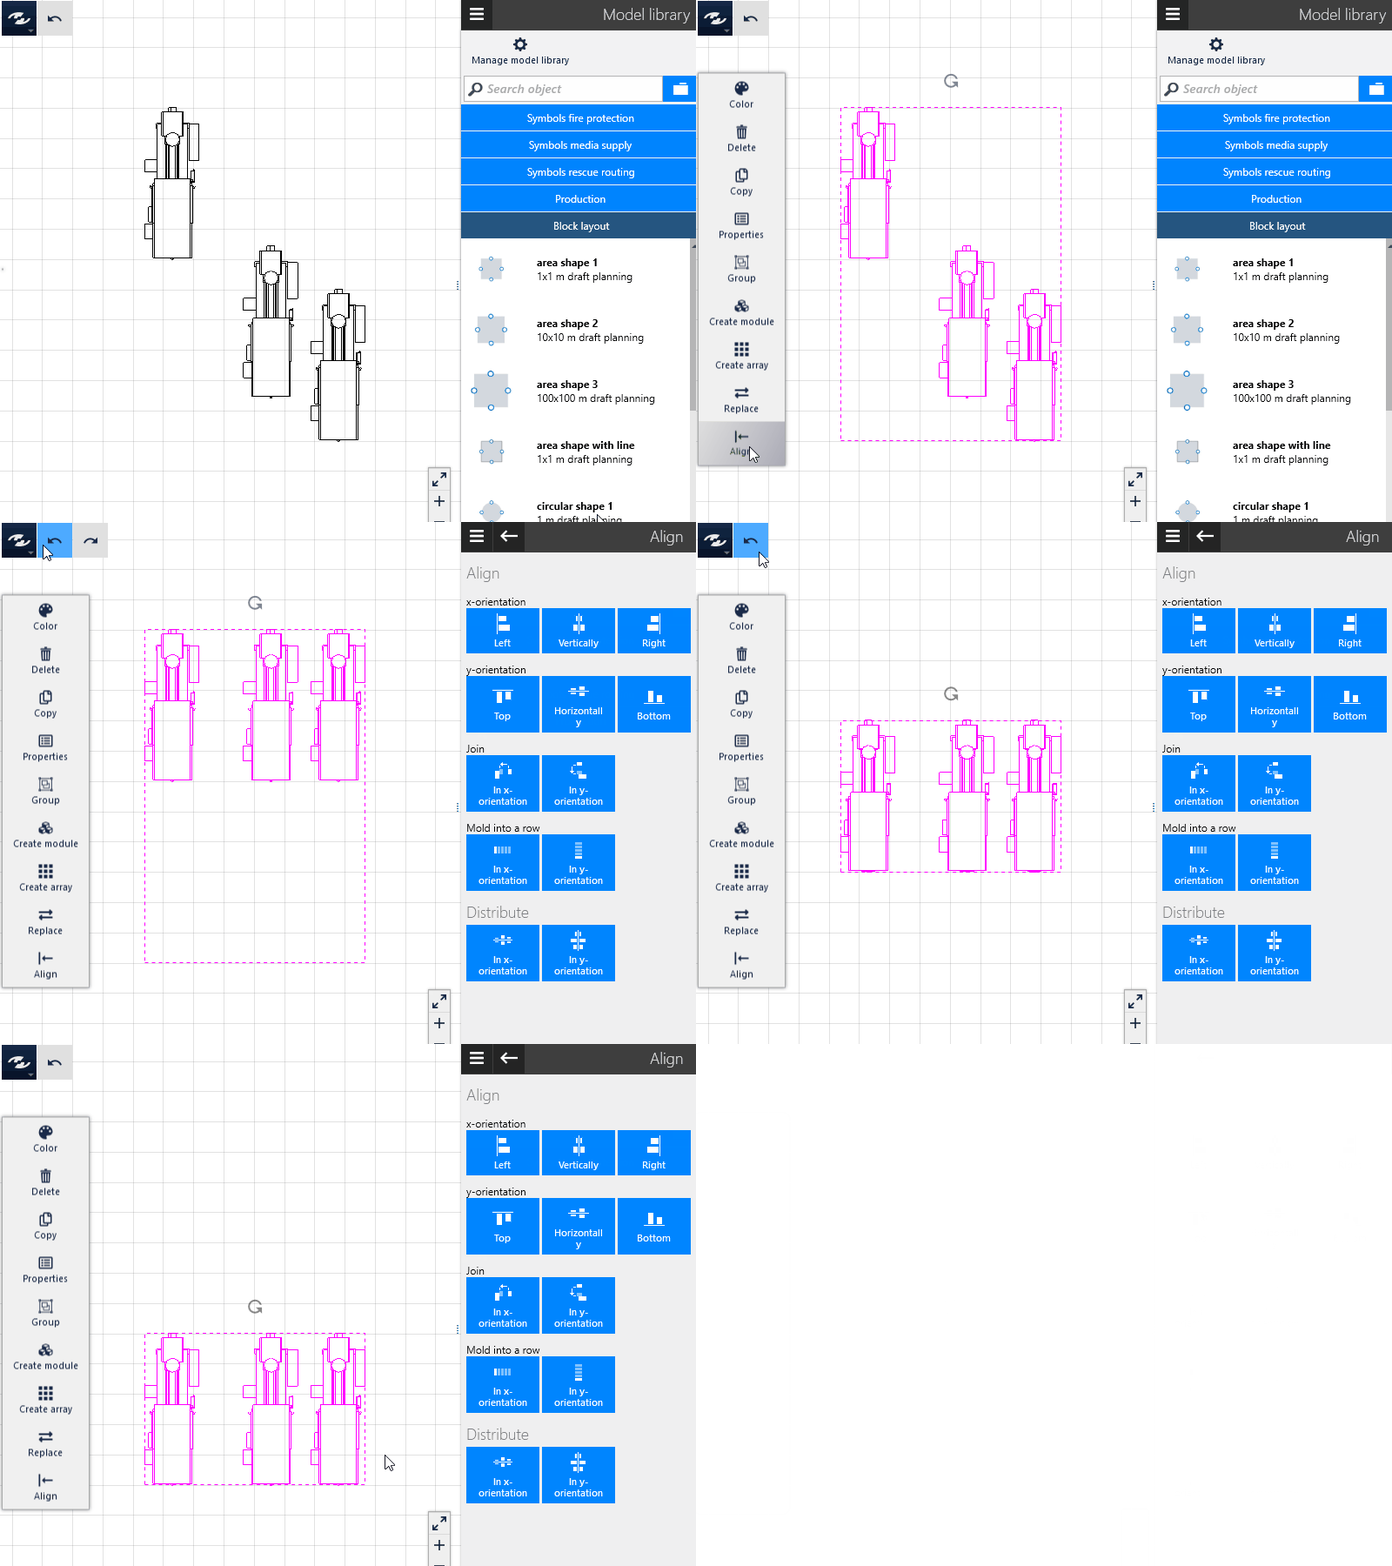
The selected objects can be aligned either to the top, center or the bottom of the vertical axis the Layout Area.
- Irrespective of the order of selection, the uppermost object is the base for
Topalignment, and the lowest object if you selectBottom. - If you select central alignment (
Center vertically), the object is aligned to the center of the selection.
Joining
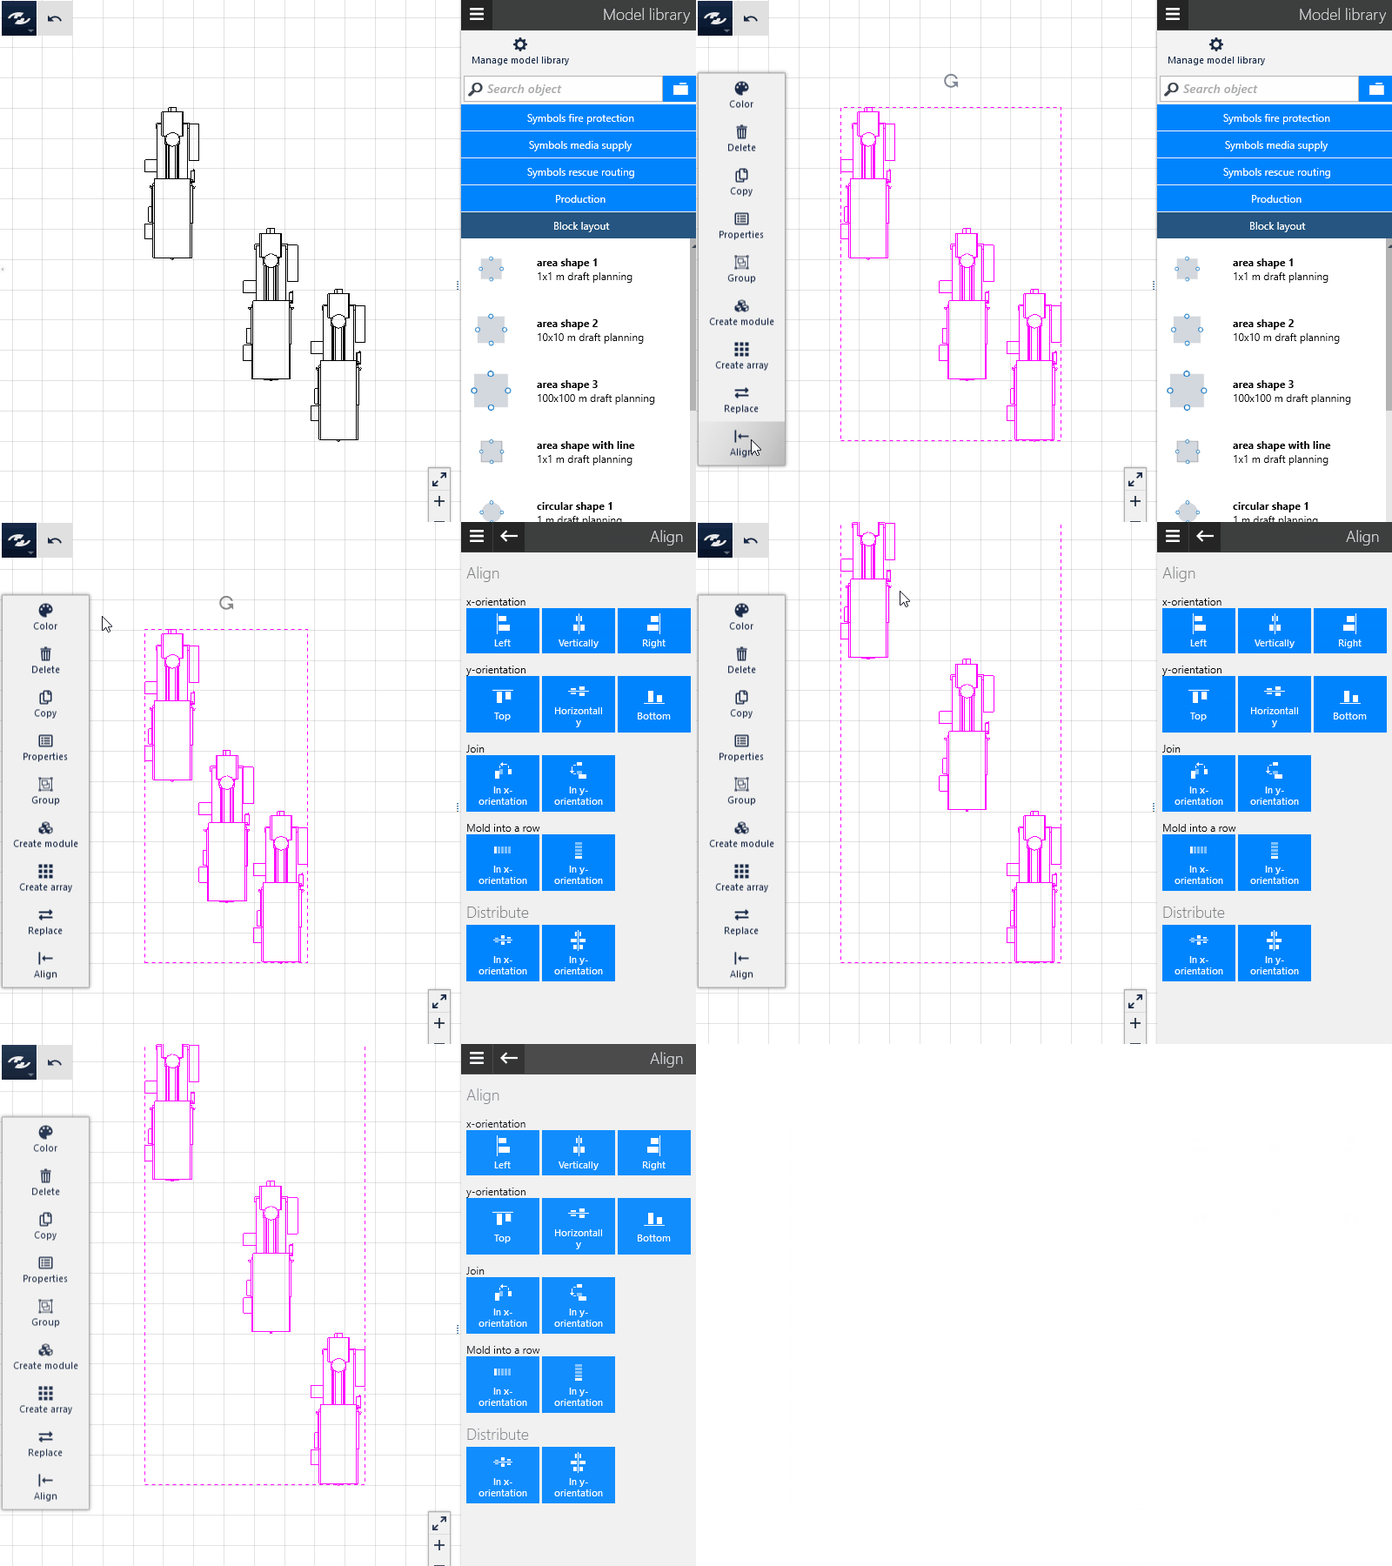
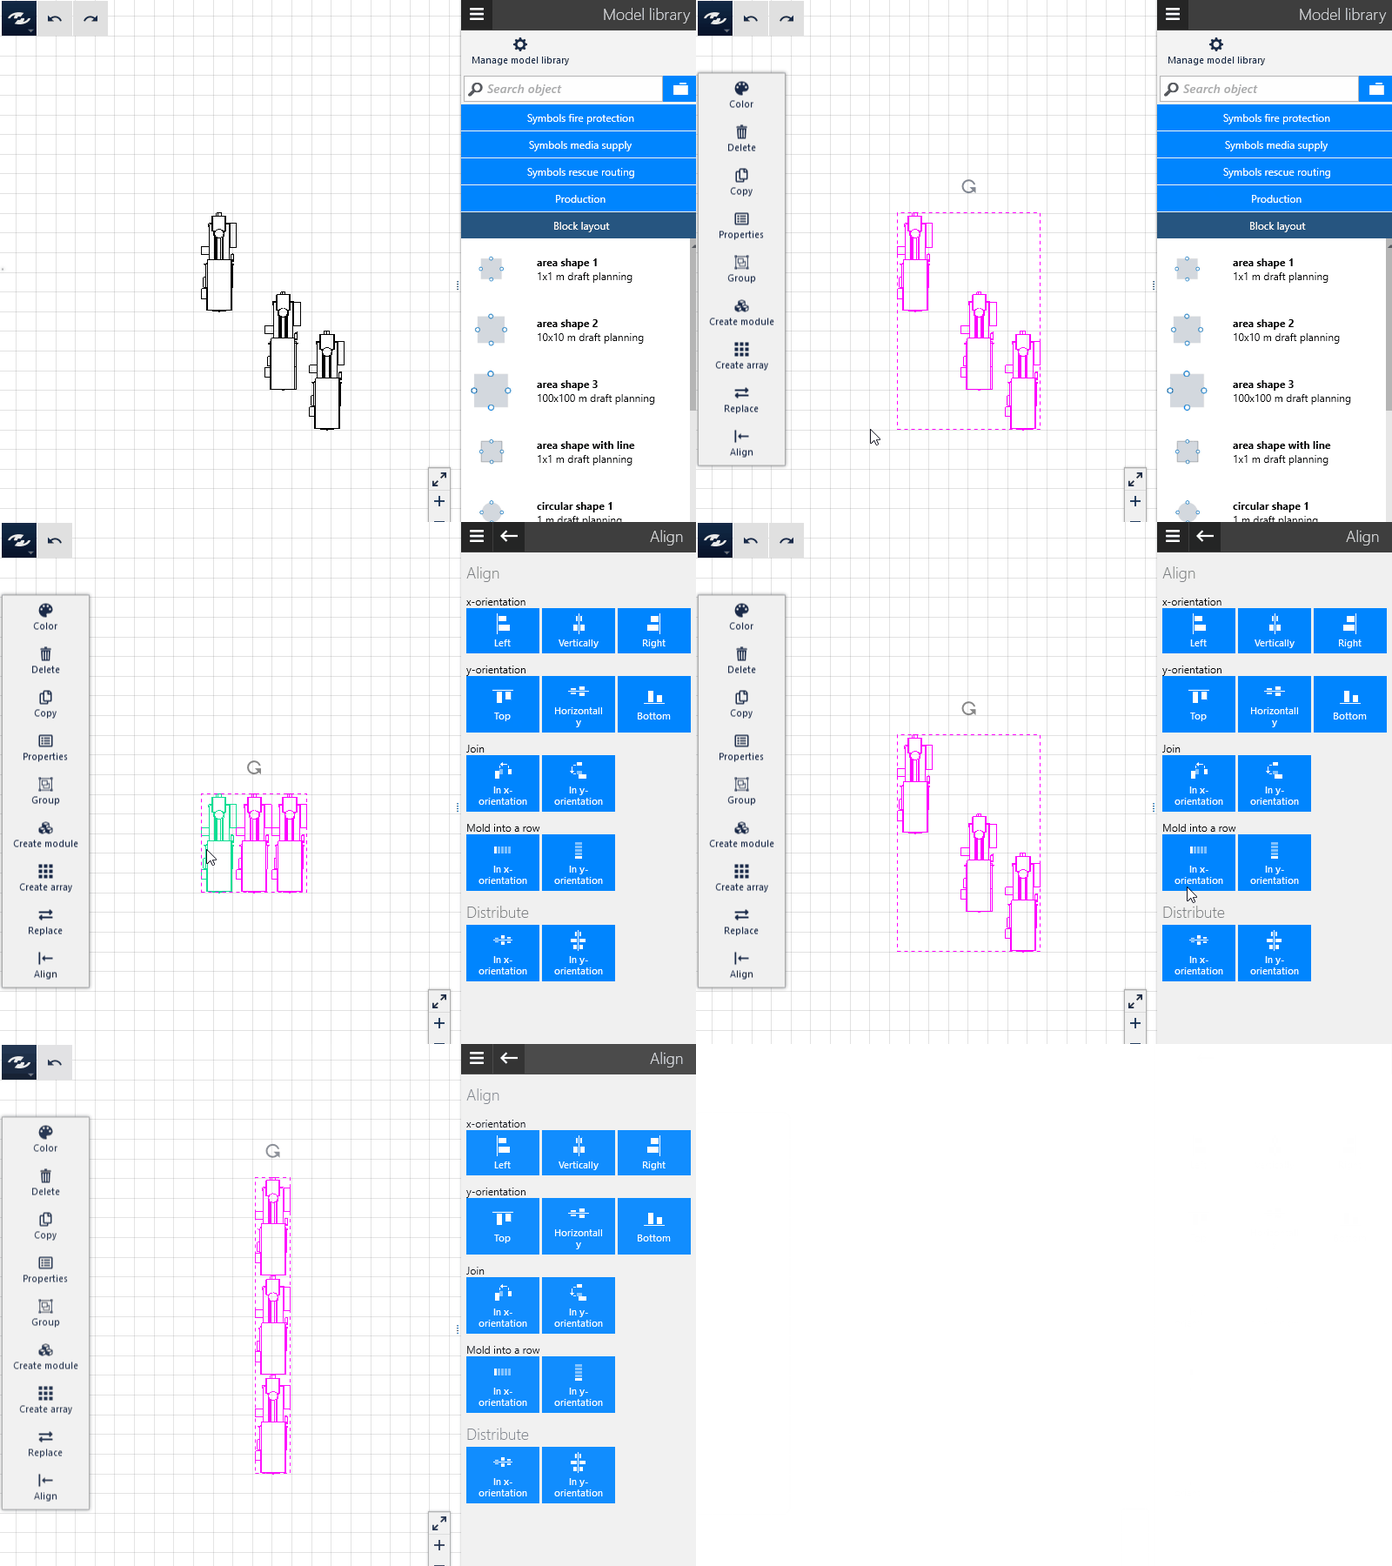
The selected objects can be joined either in the x or y direction such that no clearance remains between the objects.
Queuing
In addition to joining of objects, this function centers the objects on their central axes in the selected alignment. A row of objects results.
Distribute
At least three objects must be selected to be able to use this option.
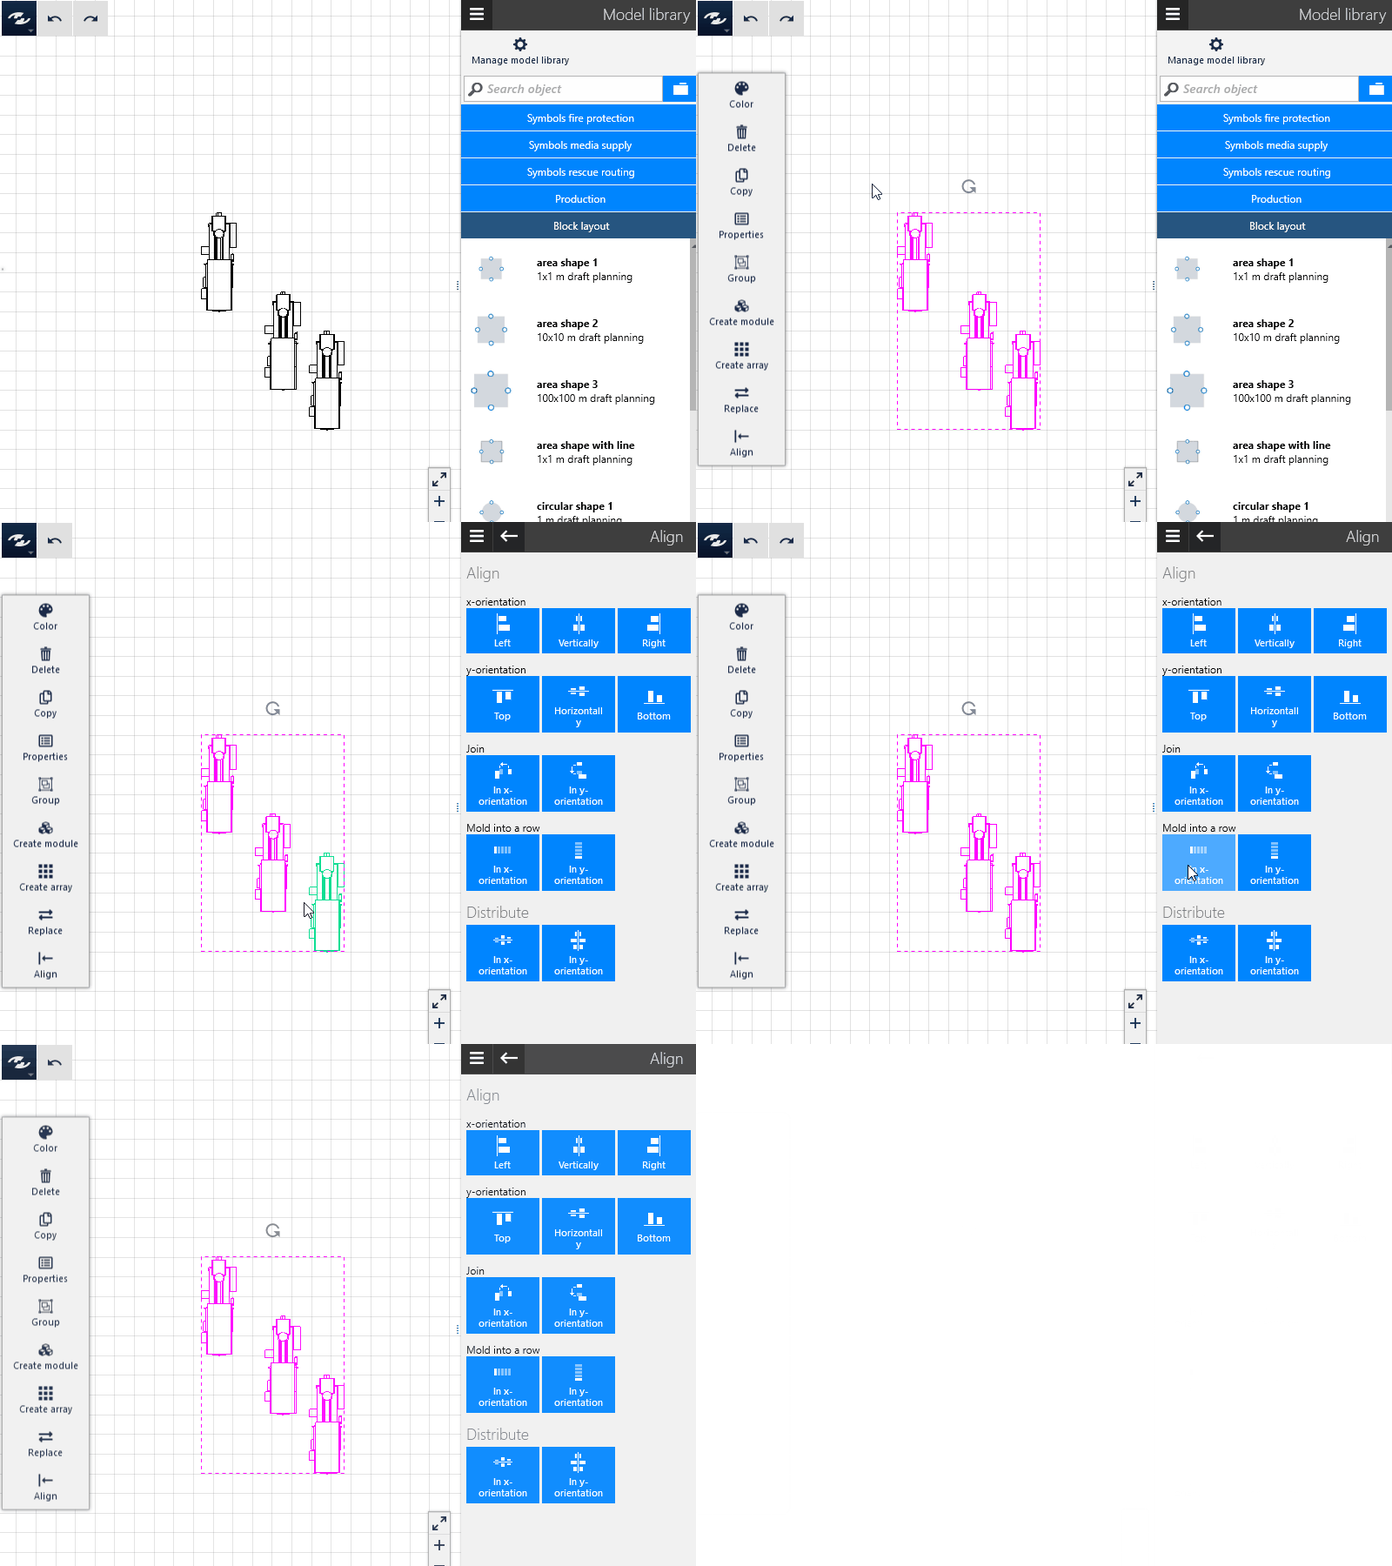
- The selected objects can be distributed either in the x direction or in the y direction.
- This operation is based on the objects that lie farthest apart, and the other objects are distributed between them such that the distances between their center points (referred to the bounding boxes of the objects) is equal.
Change spacing
To be able to specify the spacing between two objects, exactly two objects must be selected which have a distance of at least 0 mm to each other in the horizontal or vertical direction. The basic principle of this function is that the object preserves its position, and the other one is moved to a different distance that can be specified. Use the four buttons to move the object that is deemed to be fixed in position.
For example, if two objects lie horizontally side by side,
- you can move the right object, and the left one remains fixed. In this case, select the
Move object(s) to the rightbutton after you have entered the desired distance in the input field in mm. - you can move the left object, and the right one remains fixed. In this case, select the
Move object(s) to the leftbutton after you have entered the desired distance in the input field in mm.
Procedure (example)
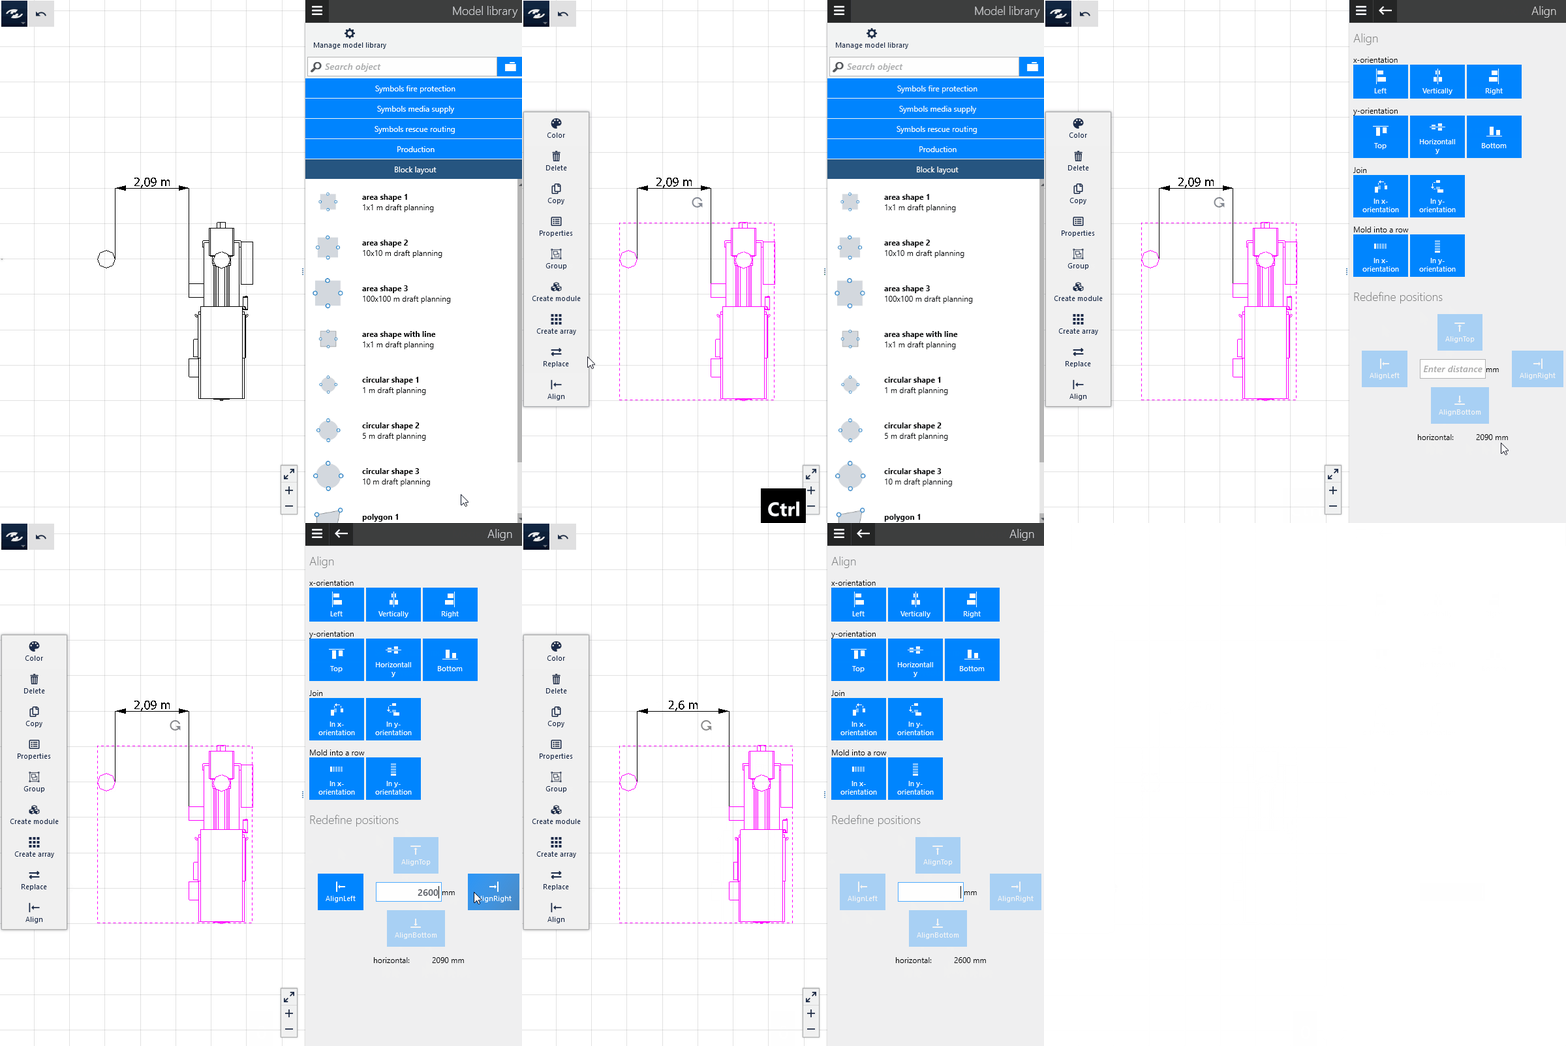
Proceed as follows to place an object at a defined distance to a column in a factory hall. No dimensioning is necessary; it was only added in the example for illustration.
- Select the two objects to wish to be arranged.
- Call the
Aligncommand in theDynamic Menu. - Specify the desired spacing, e.g.
2000, in the input field between the two buttons underChange spacing. - Click on the
Move object(s) to the rightcommand to place the object on the right (in our example) at a horizontal distance of 2,000 mm to the left object. In this case, the object on the right is moved. Alternatively, click on one of the other commands to move the object in the selected direction.
Practical tip
Columns can often be found on locked layers. In the Explorer, select “Objects on locked layers” to arrange other objects with a certain spacing to each other, starting out from these objects.