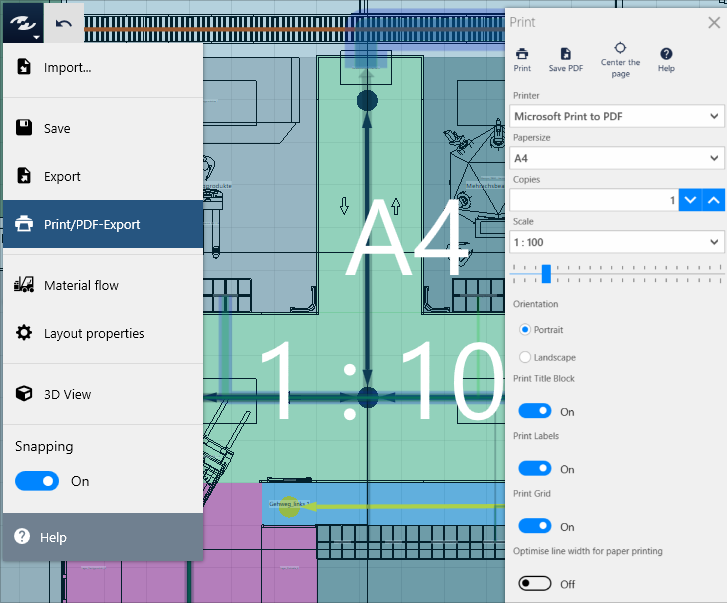
Print/Export to PDF

The printable area is marked by way of the blue preview frame; it can be moved interactively.
The printable area can be modified by way of the following parameters:
ScalePaper FormatOrientaton(portrait or landscape)
Printing of sections to scale

- In the
System menu, click onPrint/Export to PDF - Specify the printable area:
- Select the printer.
- Select the paper format and orientation.
- Use the drop-down menu or the slider to select the scale.
- Move the blue printable area until the section you wish to print is specified.
- Select the printer.
- Select the desired options (e.g.
Grid Lines,Title Block), - and click on the
Printbutton.
Save as PDF
- In the
System menu, click onPrint/Export to PDF - Specify the printable area:
- Select the printer.
- Select the paper format and orientation.
- Use the drop-down menu or the slider to select the scale.
- Move the blue printable area until the section you wish to print is specified.
- Select the printer.
- Select the desired options (e.g.
Grid Lines,Title Block), - and click on the
Save PDFbutton.
Practical tip
In some PDF viewers the line width can be adjusted with CTRL+5.
If paper is used as the final medium, then select the option Optimise line width for paper printing if necessary to ensure the output of thin lines.
Print title block
Enable the Print title block option to display the following additional information in the document:
- project name
- File path
- Scale
- Printing date
- Measuring aid

Center the printable area
Fits the printable area into the current layout section. Is especially useful if the printable area is outside the view.